Anonymization removes identifiable information. DICOM images can be anonymized or de-identified by the Tricefy cloud, or locally by the Tricefy Uplink software. When using Tricefy for anonymization, non-DICOM content (such as PDF documents) are discarded since they cannot be safely anonymized.
 See DICOM Conformance Statement for Anonymization
Below are the details and process for anonymization by the local Tricefy Uplink or Tricefy cloud.
Step 1 - Install Uplink or configure Tricefy cloud account settings
Option A. Install Uplink with the "DICOM De-identification" option enabled.
Option B. Configure a Tricefy account automation rule to anonymize the uploaded DICOM data.
For either option, the Trice Customer Success Team can also help you with this process and configure which fields that you would like to be preserved (e.g. study date)
Step 2 - Upload the study (DICOM files)
Either send the DICOM to the activated Tricefy Uplink, or upload the DICOM files through the uploader page in the Tricefy web portal.
Step 3 - Data is sent to Tricefy
Exams will appear on your study list, but with all the patient identifying info removed from the study info and images:
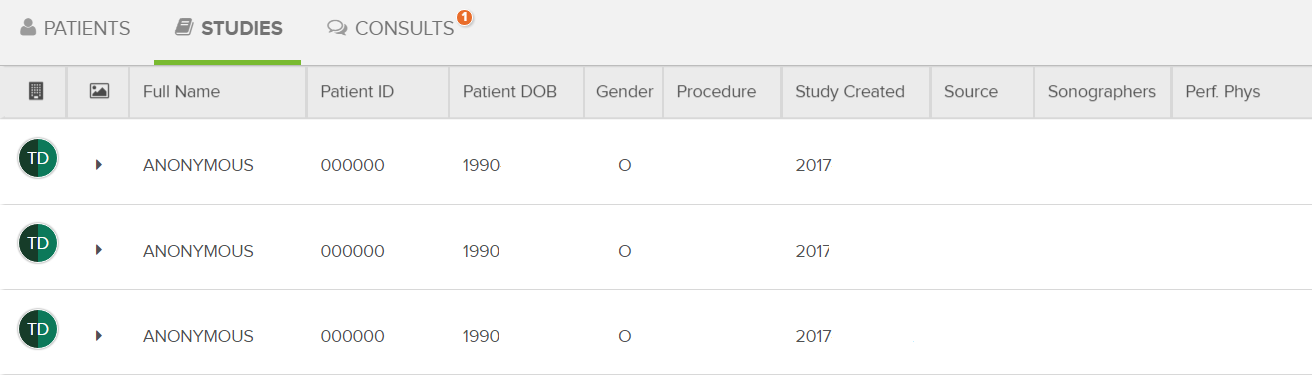
DICOM data is the information captured by the imaging system. While most things, like patient name, operator, study ID, procedure, etc. are completely removed, there are a few things that cannot be removed. These things are replaced with anonymized values instead:
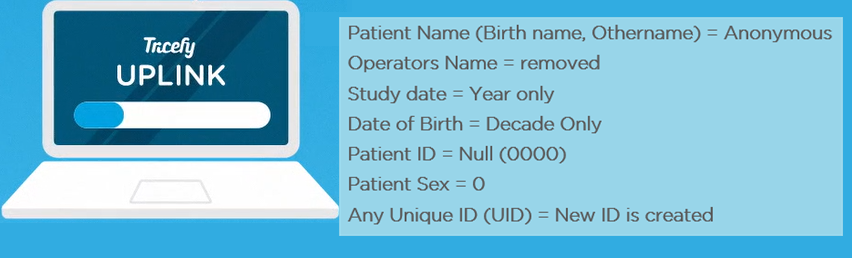
For technical details, see the DICOM Conformance Statement for Anonymization
Patient Sharing
If you share an exam with a patient, they will receive a link to their personalized landing page containing their pictures and clips with fully anonymized images.
 Copyright ©