Select Local Study Routes in your Account Settings if your clinic wants to route their images from Tricefy to a local server.
During installation (of the advanced Uplink), you must have checked the Route to Local DICOM Server checkbox and entered a Port and IP address of the local server. This information tells Tricefy where to route the data.

 Uplink Installation Instructions
If you are creating a local study route for downloading, simply proceed with the steps below.
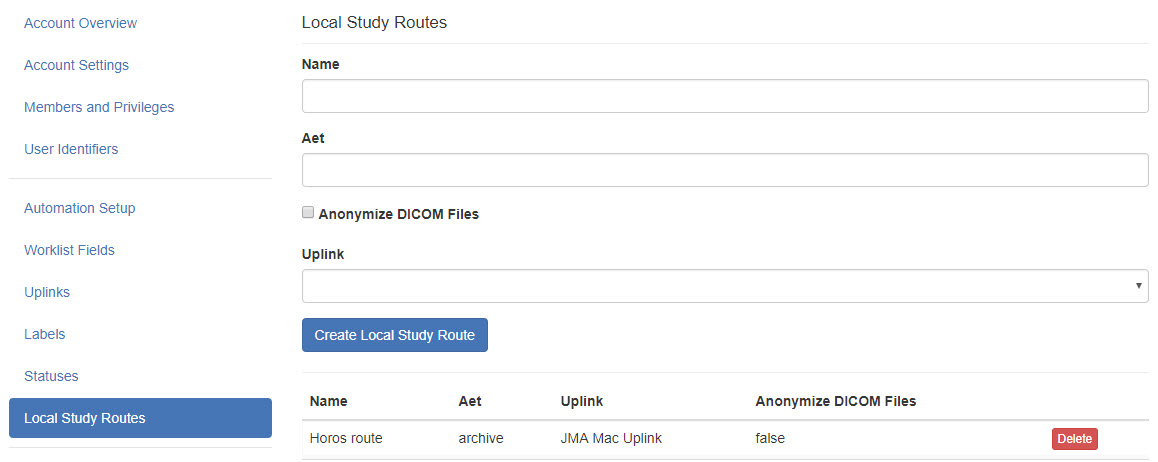
To route to a local server:
- Enter the name of the server (to help you remember where you are routing your data)
- If you are creating this study route for downloading, enter "Download"
- Enter the AE Title (AET) of your ultrasound system
- This will be the DICOM stores that were configured during installation
- Common stores are "archive" and "patient" - confirm the name of your stores in the DICOM Settings of your ultrasound system
- If you are creating this route for downloading study PDFs, leave this field blank
- This will be the DICOM stores that were configured during installation
- Check Anonymize DICOM Files to remove identifiable information
- If creating this route for downloading PDFs, this checkbox must remain unchecked
- For downloading, checking this box will result in an error message
- If creating this route for downloading PDFs, this checkbox must remain unchecked
- Choose the Uplink from the drop-down menu
- This will be the Display Name that was entered during activation
- Select the Create Local Study Route button
Once your route is created, it will be listed on this screen. Select Delete to remove a route.
 Copyright ©