To setup your Philips Lumify ultrasound system, first install the Tricefy Uplink application on your Android phone.
See instructions for installing the Tricefy Uplink app
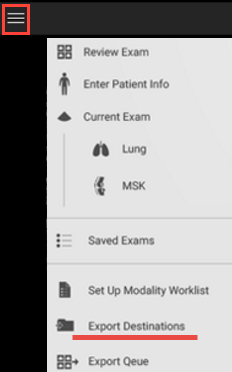
Next, open the Lumify application and select Export Destinations from the settings menu:
Select Add New Destination - we will repeat this process to add two destinations: one for sharing with patients and one for archiving:
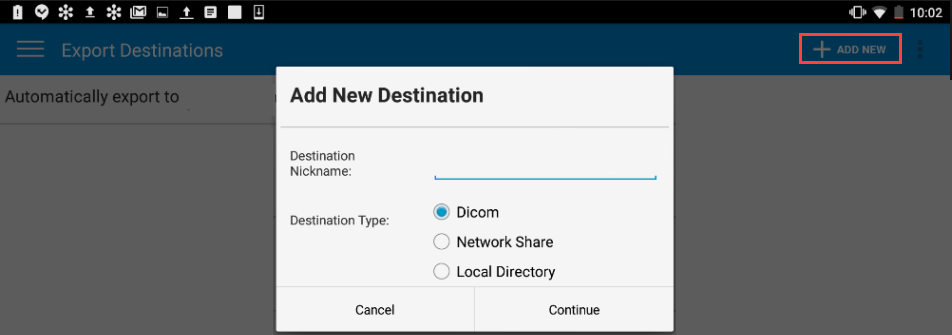
Enter "Trice" as the destination nickname, DICOM as the Destination Type and select Continue:

Enter the following information:
- Lumify AE Title: Lumify
- Remote AE Title: archive
- Hostname or IP: Refer to the Tricefy Uplink computer local IP
- If the Tricefy Uplink app is on the same device as the Lumify app, enter 127.0.0.1
- Port: 1104
- Export format: JPEG

To make sure everything works correctly, tap the Test button; a Success message will appear. If this message doesn't appear, make sure the IP address and Port number are entered correctly and that your mobile device is connected to the internet.
How it Works
After you complete an examination using the Lumify ultrasound system, select the Settings menu ( ) and choose either Current Exam (to send the current examination to Tricefy) or Saved Exams (to send previous exams to Tricefy).
To send one exam, select the exam and choose an option from the Export Exam menu in the upper-right corner. The two new locations we created will be listed:

To send multiple exams, tap and hold one exam from the Saved Exams list. After a few seconds, you will be able to select additional exams. Select an option from the Export Exam menu to send all the selected exams to Tricefy.
A message will display once the exam was exported to Tricefy.
 Copyright ©