Select Uplinks in your Account Settings to see your clinic's Uplink's IP address, Port, and Status. Larger clinics will have multiple Uplinks:
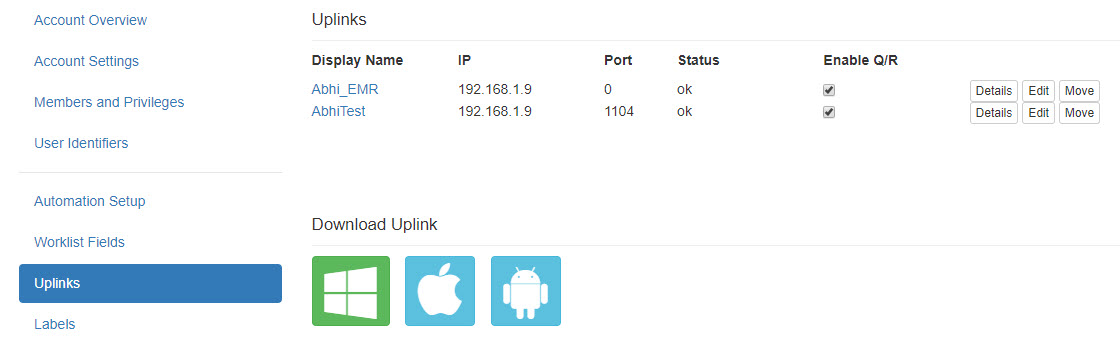
- Display Name: This is the name that was chosen when you activated your Uplink (after installation)
- IP: This is the IP address of the computer that has Uplink installed
- Port: This is the port that is receiving the data from your ultrasound system
- Status: This indicates if your Uplink is receiving data
- OK: Indicates that your Uplink is online and functioning properly
- Failed: Indicates that your Uplink is offline, perhaps because the computer is turned off or disconnected from the internet
 Additional Troubleshooting Steps
- Enable Q/R: Allows query-and-retrieve
- By default, this option is enabled
- For security reasons, this option will be disabled if you are using Tricefy Inside
- Details: Displays technical information for troubleshooting (refer below)
- Edit: Displays a screen for renaming your uplink and for removing an uplink from your account
- Select Back on your browser to close this window without making changes
- Once an uplink is removed from your account, it can no longer be used unless the software is reinstalled
- Move: An option only available for members of multiple accounts for moving your Uplink to a different Tricefy account
Download Uplink
To download Uplink on a different computer, or to reinstall for troubleshooting purposes, select the appropriate icon under Download Uplink:
- Select the Windows icon if using a Windows computer or laptop
- Select the Apple icon if using an iPad, iPhone, or Apple computer
- Select the Android option if using an Android phone or tablet
Uplink Details
Selecting the Details button (or selecting the Uplink's display name) will show the following information for that specific Uplink. This information is helpful for troubleshooting.
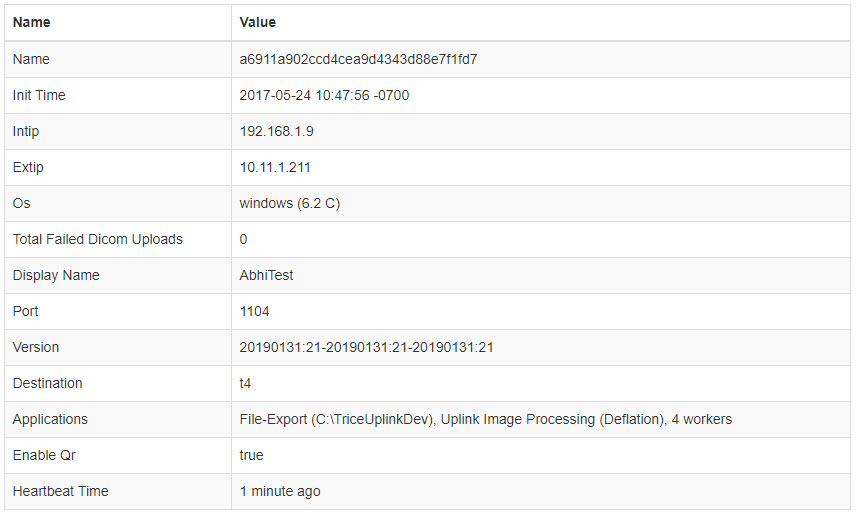
- Name: This value was automatically assigned during installation
- Init Time: The first time that your Uplink communicated with Tricefy
- Intip: Internal IP address (the IP address of your computer)
- Extip: External IP address (the IP address of your ultrasound system)
- OS: The operating system that your Uplink computer is using
- Total Failed DICOM Uploads: The number of exams that did not upload to Tricefy
- Display Name: The name entered during the initial installation of Uplink
- You can change this name by selecting the Edit button on the previous screen
- Port: The port number that was specified during installation
- Version: Auto-assigned value
- Destination: The version of Tricefy that you are using
- T3: Older version (currently being phased out)
- T4: Current version
- Applications: Only visible if the Advanced Uplink is installed
- Values shown here indicate the settings that were selected during installation:
- File-Export (C:/location/folder): Indicates you are exporting files and where their destination location
- Routing/Retrieving: Indicates you are routing studies to an external server
- VP6: Indicates you are sending studies to ViewPoint
- VP6 Client: Uplink is installed on individual workstation
- VP6 Server: Uplink is installed on ViewPoint server
- Installing a new version of Uplink on the VP Server will automatically update the VP Clients next time the ViewPoint application is opened
- EMR Intf : File-copy: Indicates you are integrating with an EMR system
- Uplink Image Processing: Indicates optimization/compression is performed by the Uplink (rather than locally)
- Values shown here indicate the settings that were selected during installation:
- Enable Q/R: Indicates if query-and-retrieve is active
- This feature can be turned on and off on the previous screen
- Embedded: Only shown for Tricefy Inside users
- Values shown here indicate the device you are using (Vscan, Voluson, etc.)
- Heartbeat Time: The most recent date and time that your Uplink communicated with Tricefy
 Copyright ©