Select Image Branding in your Account Settings to change the logo that is shown on patient emails, landing pages, and images.
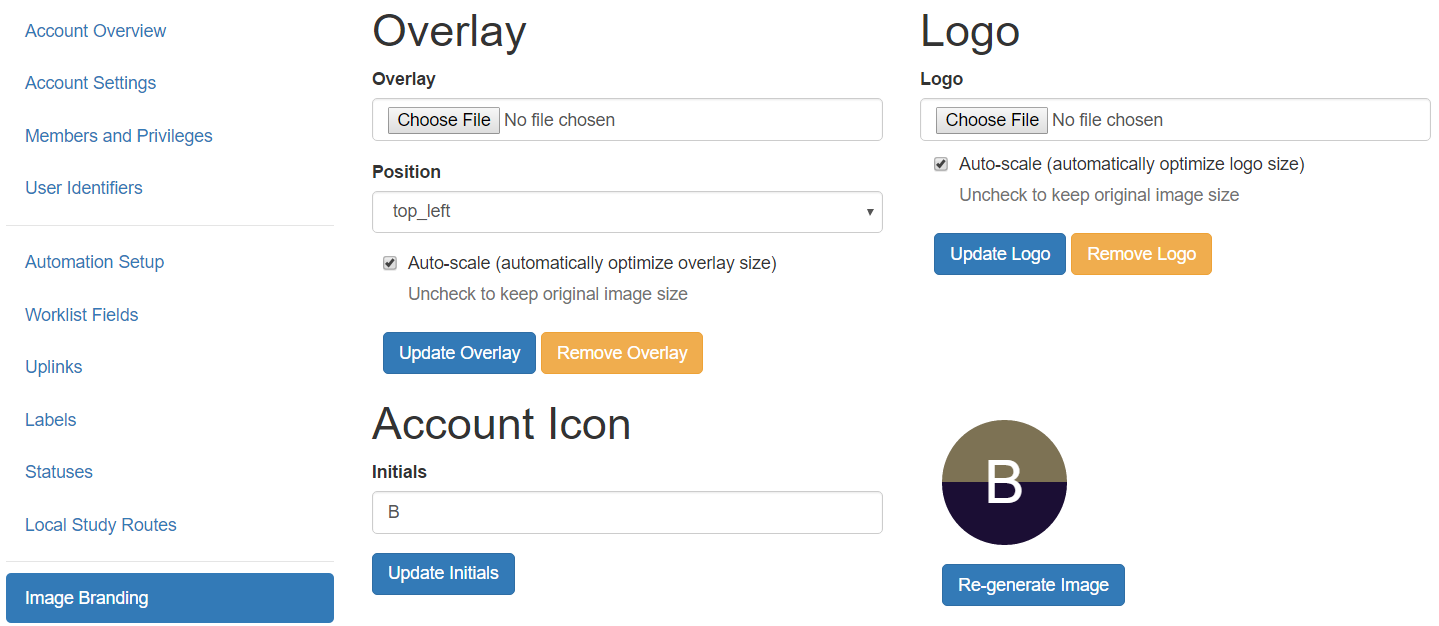
Overlay
The Overlay is the clinic logo that is placed on ultrasound images. It is recommended that this image have a transparent background (file type for transparent backgrounds must be .png):

- Select Choose File to select a logo from your computer/network
- Choose a Position from the drop-down menu to specify where to display your logo
- Uncheck Auto-scale to upload the image using the original size; otherwise, it will automatically be scaled to our default size
- Recommended overlay image size: 100px - 250px wide
- Select Update Overlay to save
To remove your overlay so that it is no longer placed on images, select the Remove Overlay button.
Note: When you upload your first logo, it will also be the overlay by default. Select Remove Overlay to remove it, or select Choose File to upload a different image.
Logo
The Logo is the clinic logo that is shown on outgoing patient emails. It is also located at the top of the Landing Page. This can be any branding content you prefer.
![]()
- Select Choose File to select a logo from your computer/network
- Uncheck Auto-scale to upload the image using the original size; otherwise, it will automatically be scaled to our default size
- Recommended logo size: No larger than 350px wide
- Select Update Logo to save
To remove your logo so that it is no longer located on patient emails and landing pages, select the Remove Logo button.
Account Icon
The Account Icon is the icon shown in the first column of your Study List. For members of multiple clinics, this helps identify the owner of each study.
![]()
- Enter the initials of your clinic
- Select Generate Image to create an icon
- Select Re-generate Image to create the icon using different colors
 Copyright ©