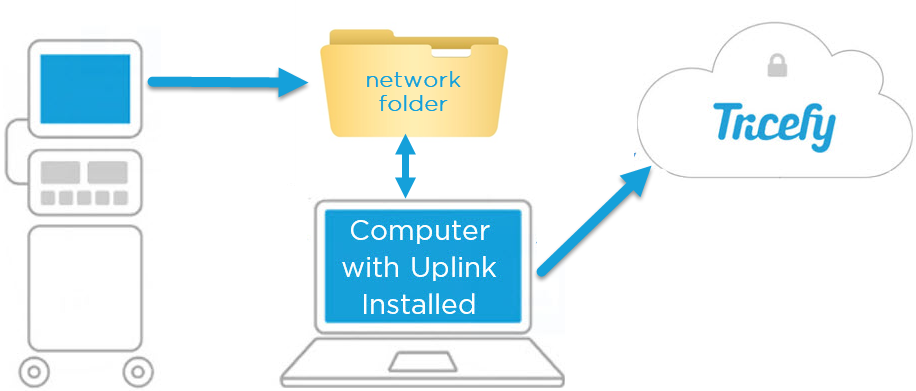
PDF report documents cannot be sent to Tricefy using the standard DICOM sending destination. Instead, the ultrasound will send the documents to a network folder via the Export option. From there, the uplink will automatically detect any content located in this network folder and upload it to Tricefy, so no any additional steps are added to your workflow.
To setup your ultrasound to send PDF reports to Tricefy:
1) Create a shared folder on your network drive or on the same computer/server running Uplink
2) Ensure "Everyone" user group has permissions for Read/Write access to folder
3) In the DICOM server config of uplink, set the "PDF PID segment" number to where the patient ID will be in the filename (2 for GE ultrasounds, 1 for Samsung ultrasounds), and set the monitor path to the shared folder you created.

4) Configure your ultrasound system to send non-DICOM data to the folder you created in Step 1 (these settings are typically found within the "Map Network Drive" settings). We have additional instructions specifically for Voluson users below.
5) Send a report/PDF to Tricefy
5a) Create report/worksheet or PDF as usual
5b) After sending the images to Tricefy, Export your document to the folder created in Step 1
5c) Uplink will recognize the folder has new content and upload the document
How to Map A Network Drive on GE Volusons
To configure your Voluson Series ultrasound system with a mapped network drive (step 4 above):
1) Select the Utilities hard-button located on the machine
2) Select Setup (or System Setup)
3) Select Connectivity, followed by the Drives tab
4) Select Map Network Drive
- Drive number: "NW Drive 1"
- Network Folder Name: Input the folder path you created in Step 1 of this article -- format will usually be
\\<IP_address>\<folder_name>
- User: Enter a Windows username which has privileges to read/write to the shared folder
- Password: Enter the Windows user password for the user entered above
- Check the Automatic Reconnect box
- Select the Connect button
- If connection is successful, the "Disconnect" button will become active
- If connection fails due to incorrect user/password, a corresponding error message will pop up
- sometimes the the domain name/group of the Windows network and a backslash is required with the user (e.g. UCS\WindowsUser)
- If connection fails because the network folder cannot be found, eventually the attempt will timeout with a corresponding error message
- ensure the entire folder path is correct and/or the folder share is active on the computer
Below a screenshot of the Map Netowrk Drive screen on a GE Voluson:

 Copyright ©