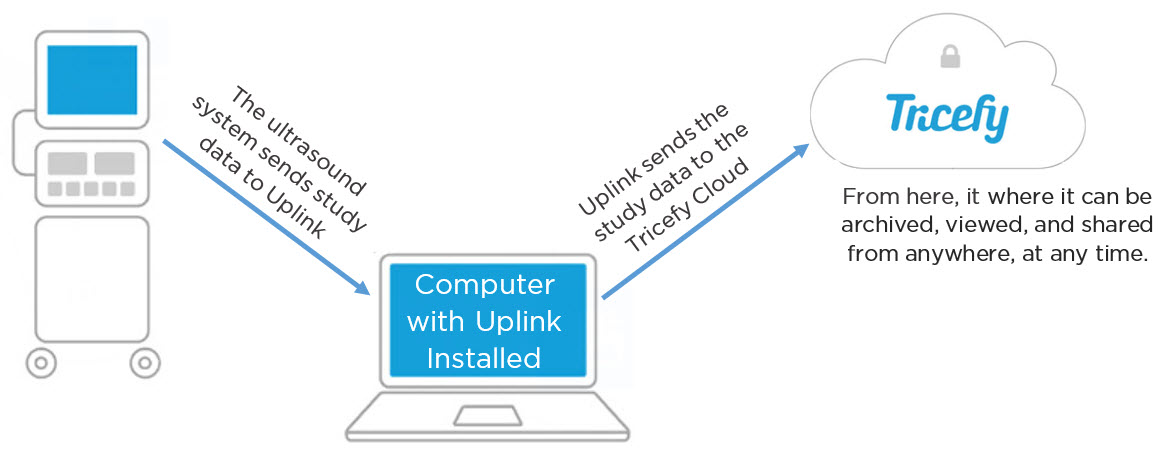
Uplink is the software that allows your ultrasound system to communicate with your Tricefy account.
Typical Uplink is our default software that provides the basic features, including anonymized DICOM data, PDF-protected documents, archiving and patient-sharing functionality.
If your clinic is using advanced features, such as sending data using ViewPoint, exporting, or routing to an external PACS server, please refer to the Advanced Uplink Installation Instructions.
First-time Tricefy users will be prompted to install Uplink once they log into their Tricefy account.
If your clinic is using multiple imaging systems, additional Uplinks can be downloaded either by Account Administrators within the Account Settings (recommended), or by using a direct link.
 Instructions on downloading Uplink from within Account Settings
Direct links for downloading Uplink
After downloading the Uplink executable:
- If using Internet Explorer, the downloaded file appears at the bottom of the screen. Select Run to begin the install:

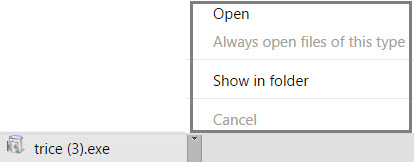
- If using Chrome, the downloaded file appears in the Downloads Bar at the bottom of the screen. Select Open to begin the install:
- After the file is downloaded, you can find it in in the Downloads folder (using Windows):

NOTE: Make sure that the Uplink computer is configured so that the drives do not fall asleep.
Installation
A standard dialogue box may ask to make changes to your computer. Click Allow.
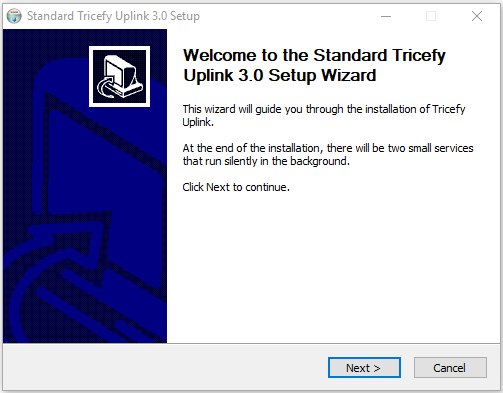
A wizard will guide you through the short installation process. Click Next to begin:
Choose to accept the license agreement, followed by Next:

By default, Typical Installation is already selected. There is nothing to do on this screen except select Next again:

The next screen contains a single text box with a number. This number is called a Port, and it specifies where the ultrasound system should deliver studies (like a mail box). By default, this number will be 104. If another application is using Port 104 (to communicate with your computer about something else), this number will be 105.

Check the Tricefy-Only Computer box if this computer is intended specifically for Uplink. If this computer is used for other things, it is recommended to leave the box unchecked.
The only thing left to do is click Install.
The software installs in less than a minute.
When it's complete, we will see a dialog box showing us the Port (the same one we saw on the screen above), and the IP address of your computer. .
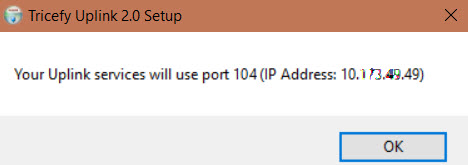
These two pieces of information tell the ultrasound system where to send data so that Uplink can deliver it to Tricefy.
Simply click OK to close the window.
Activation
Immediately after installation, a browser window displays to activate the new Uplink. If not already logged into Tricefy, a login window will display first.
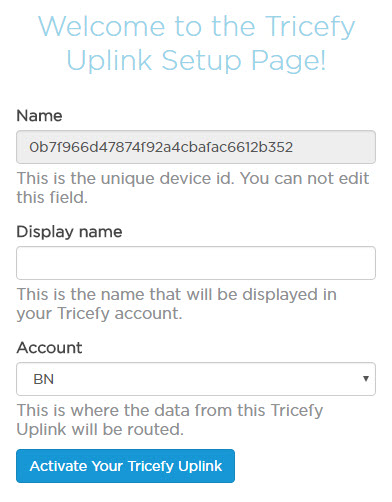
Enter a Display Name (in case your clinic has more than one Uplink, this will help you tell them apart) and verify the Account shown is the correct account (some users have multiple accounts). Press Activate Your Tricefy Uplink to complete the installation process.
Note: Reinstalling Uplink does not require additional activation.
Note: Mac users on an older operating system (10.6 or lower) need to contact the Tricefy Help Center or their Tricefy Administrator for activation.
 Copyright ©