Follow the process below to configure your ultrasound system to send data to Tricefy.
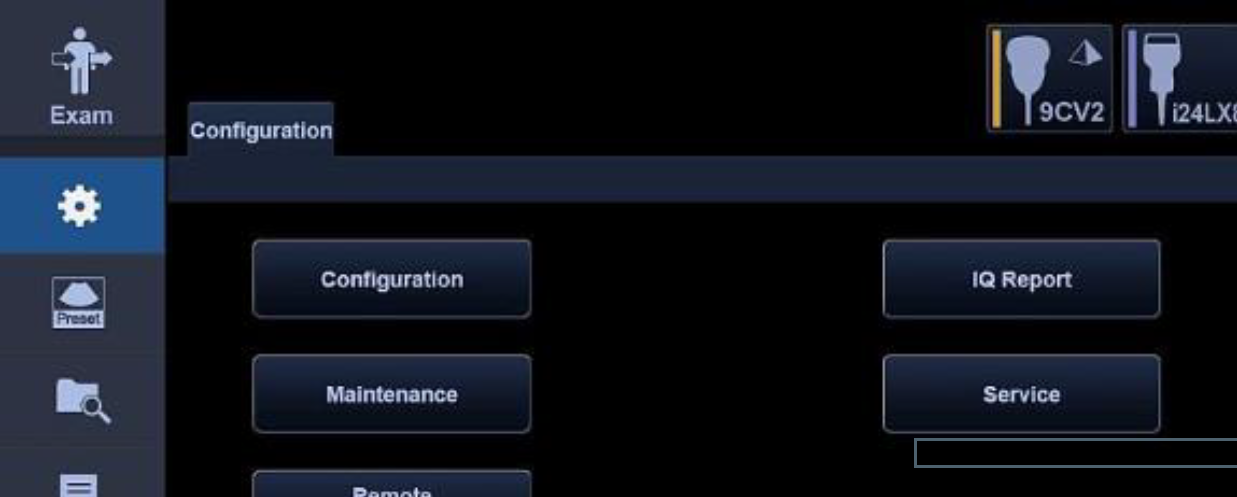
1. First, go to Configuration button on the side of the touch panel, followed by the Service button:
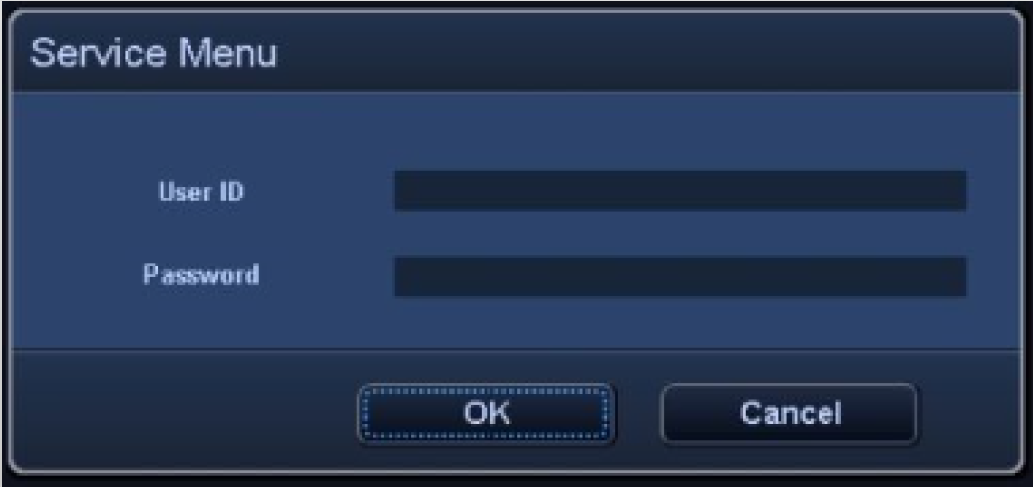
2. Enter access information - you must have a service user ID and password to configure the ultrasound to proceed
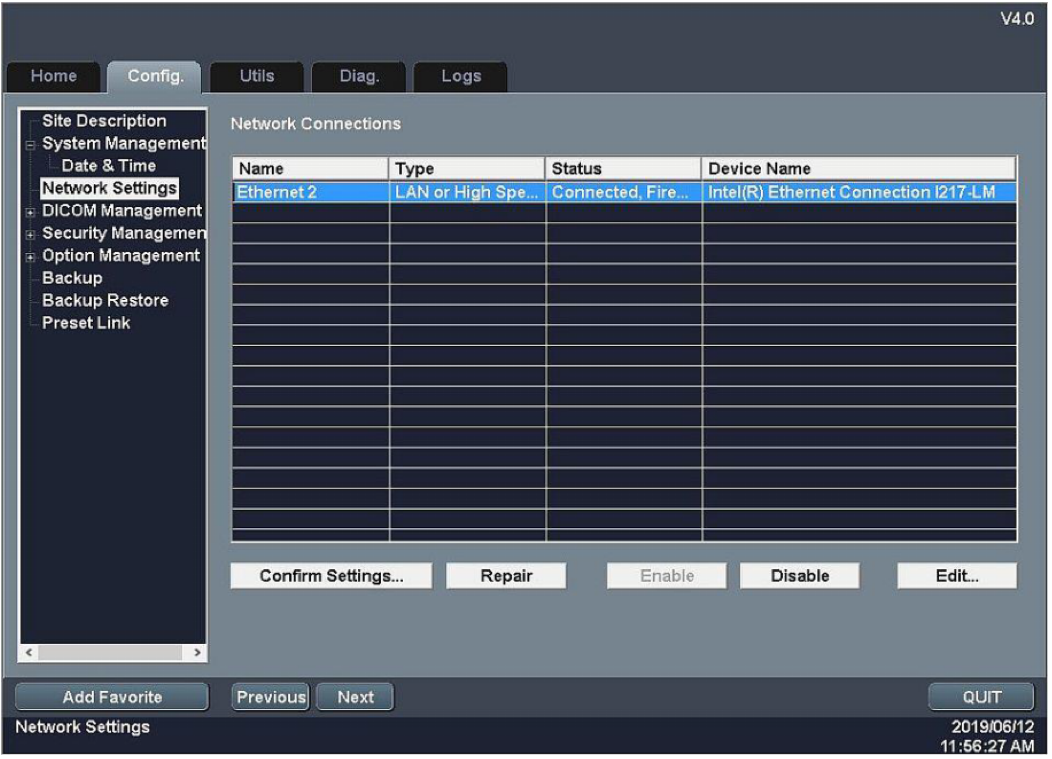
3. Once the system has been connected to a network, go to Config – Network Settings – Click Edit
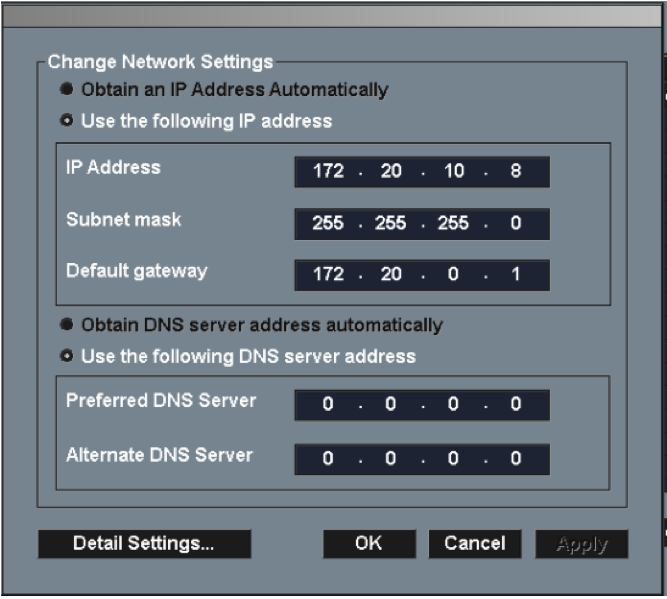
4. Adjust IP settings (if needed) assigned for the system, then click Apply
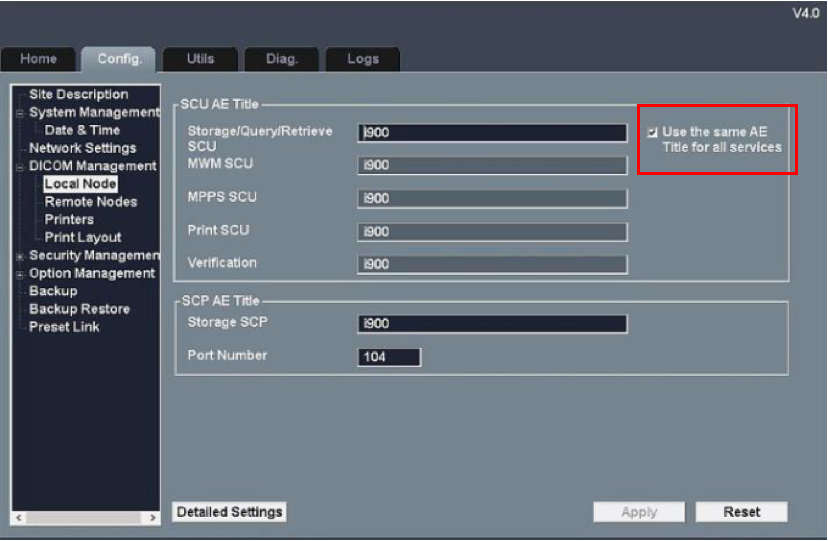
5. Go to Config – DICOM Management – Local Node
6. Check "Use the same the same AE title for all entries" box on the right side
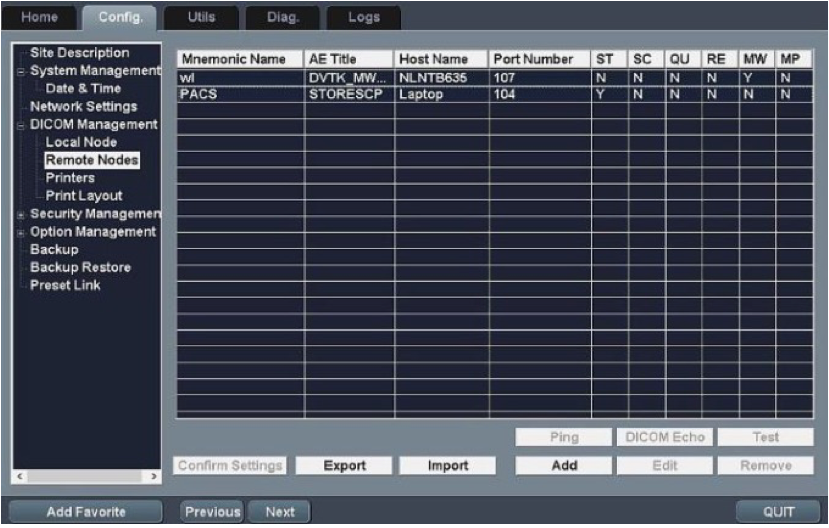
7. Go to Config – DICOM Management – Remote Node – Click Add
8. Enter following information for Sharing function
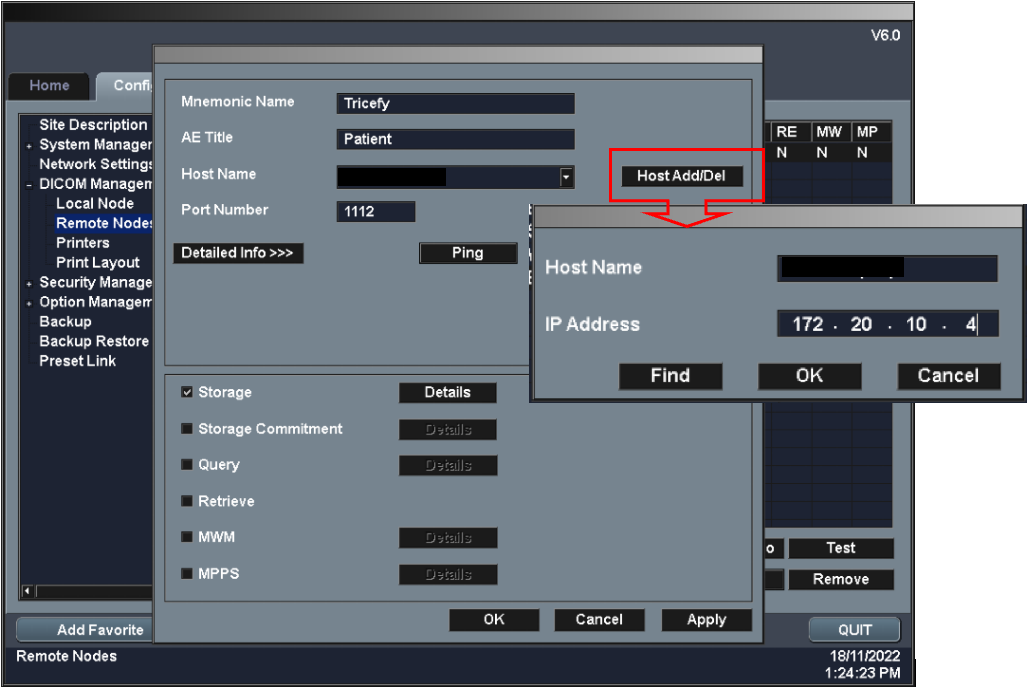
Mnemonic: Tricefy
AE Title: patient
Click Host Add/Del and create Host Name
IP Address = shown during installation or refer to Account Settings
Port = 1112 (refer to Account Settings)
9 . Mark Storage, click Details
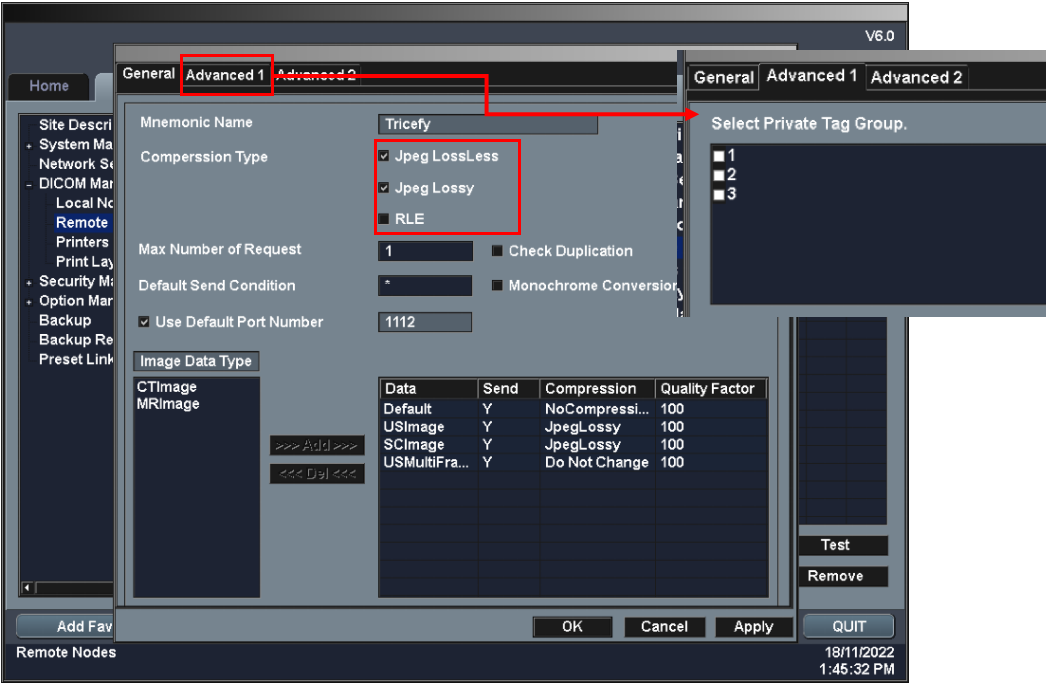
10. Set the Compression Type as shown – then Select Advance 1 and uncheck all boxes.
11. Repeat steps 8-10 for adding the Storage function by enter following information
Mnemonic: Tricefy
AE Title: archive
Click Host Add/Del and select created host.
IP Address = shown during installation or refer to Account Settings
Port = 1112 (refer to Account Settings)
12. Press Apply and OK.
13. Verify the connection with Ping – DICOM Echo - Test
14. To finalize the setup open System Preset – Device Setting – Printer & Server Assigned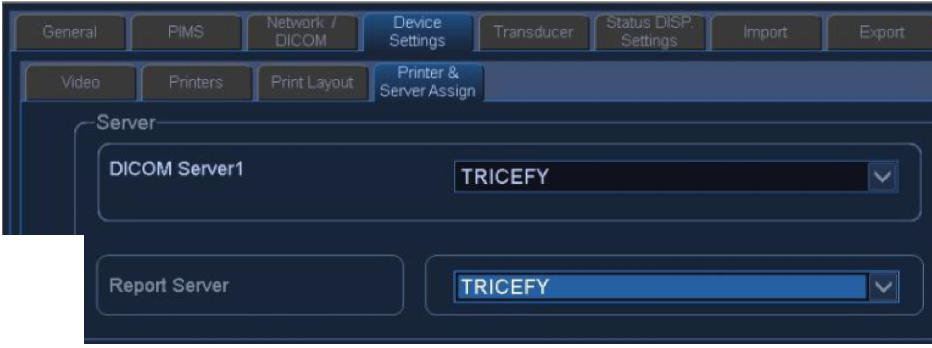
 Copyright ©