Follow the process below to connect your Mindray DC-70 and other DC series ultrasounds to Tricefy.
Step 1
Enter the DICOM local preset screen by pressing the F10 [Setup] key and then selecting the DICOM/HL7 tab.
Step 2
Enter Tricefy for the Device name and then the IP address of the computer running the Tricefy Uplink software. Click Ping to test connectivity.
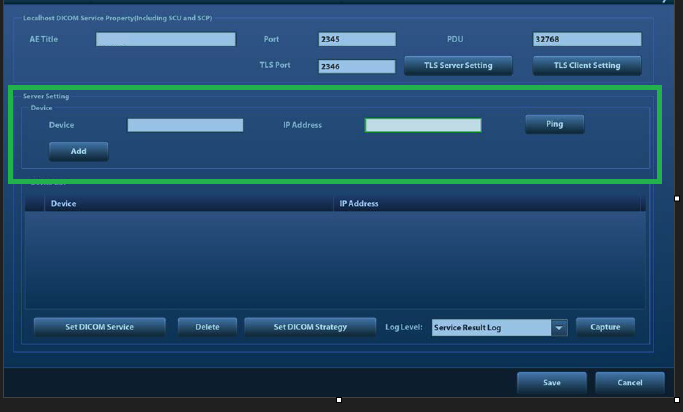
Click the Add button if the Ping is successful. The "Tricefy" device will appear in the list below.
Now, we need to add DICOM services that will communicate with the Device that was just created.
Step 3
Select "Tricefy" in the Device list and click on the Set DICOM Service button.

The following screen appears.
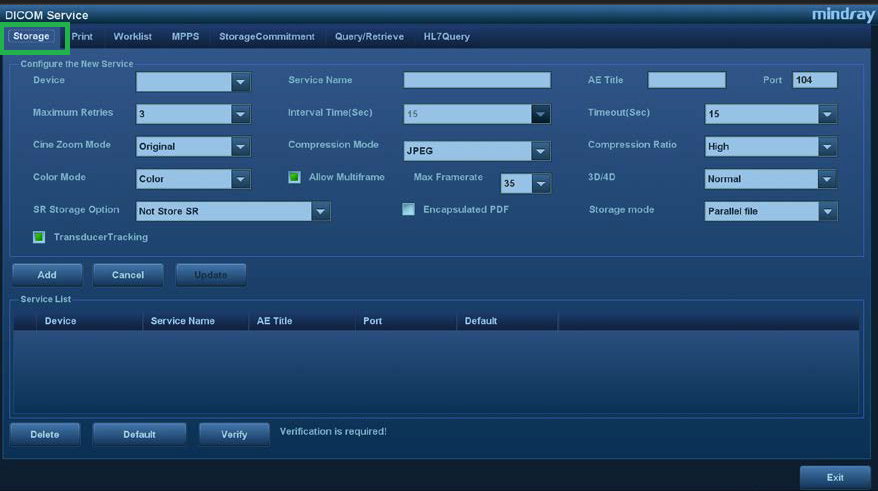
On the Storage tab, enter the following information:
Step 3a - For Tricefy Archive
- Device → select the Tricefy device created earlier
- Service Name → Tricefy Archive
- AE Title → archive
- Port → this is the port that was configured during the Uplink installation. (This is typically port 1112)
Now update the following compression/quality settings:
- Compression Mode → JPEG
- Compression Ratio → Lossless
- Color Mode → Color
- Allow Multi-Frame → check mark
- Max Framerate → 30 or 35
- 3D/4D → Normal
- *OptionalEncapsulated PDF → Check this box if you want to send a PDF copy of the ultrasound report/worksheet
- *OptionalSR Storage Option → If you will be using Tricefy’s Adaptive Reporting feature then make sure this option is enabled. The SR file contains the measurement data that Tricefy will use to populate the report templates. Enable this for the Trice Archive service only.
Leave all other values as-is.
Click the Add button. The newly created service will now appear in the list below.
Highlight the service entry and click the Verify button. If Verify fails then make sure the port number is correct and the local firewall is not blocking outbound traffic to the Tricefy cloud.
Recommended: select "Tricefy archive" from the service list and click the Default button to make the ultrasound automatically send all captures to Tricefy after the exam has been ended. (Default: Y)
Step 3b - For Tricefy Patient Sharing (if applicable)
- Device → select the Tricefy device created earlier
- Service Name → Tricefy Patient
- AE Title → patient
- Port → this is the port that was configured during the Uplink installation. (This is typically port 1112)
Now update the following compression/quality settings:
- Compression Mode → JPEG
- Compression Ratio → Lossless
- Color Mode → Color
- Allow Multi-Frame → check mark
- Max Framerate → 30 or 35
- 3D/4D → Normal
Leave all other values as defaulted.
Click the Add button.
The service will now appear in the list below. Highlight the service entry and click the Verify button.
Step 3c - For Tricefy Worklist (if applicable)
If your EMR integration with your Tricefy account supports Modality Worklist, then you can use the worklist.
On the Worklist tab, enter the following:
- Device → select the Tricefy device created earlier
- Service Name → Tricefy Worklist
- AE Title → worklist
- Port → this is the port that was configured during the Uplink installation. (This is typically port 1112)
Click the Add button.
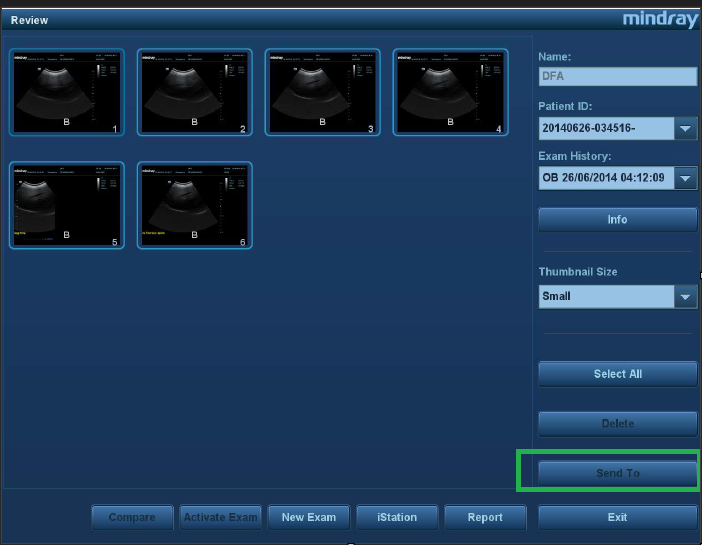
How to manually send images using iStation
To send images manually to Tricefy at any time you can review the exam in iStation, select the images from the list, and use the Send To option to select the Tricefy Archive or Tricefy Patient (for patient sharing) option.
 Copyright © 2016-2026 Trice Imaging, Inc. All rights reserved. 1065 SW 8th Street | PMB 5828 | Miami, FL 33130 | USA