After you install Tricefy and activate your Vscan, you will see Tricefy listed under Server Settings:
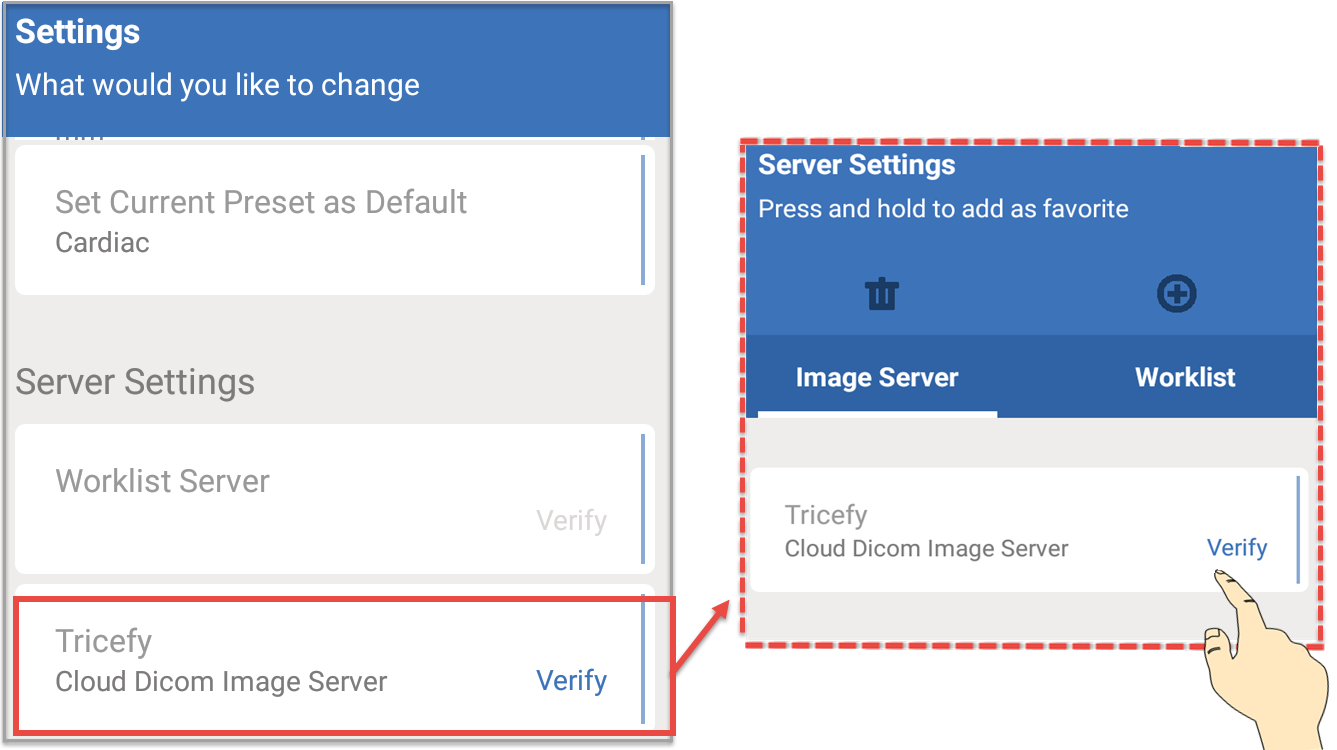
To make sure your Vscan can communicate with your new Tricefy server, tap Verify to perform a test.
If everything is working correctly, a Verify OK message will display.
- If your test does not work, make sure your Vscan is connected to the internet
Make it your Favorite
Tap and hold the Tricefy button (listed under your Server Settings, as shown above) to make it your "favorite" (default) server. Select Add and your examinations will automatically upload to Tricefy!
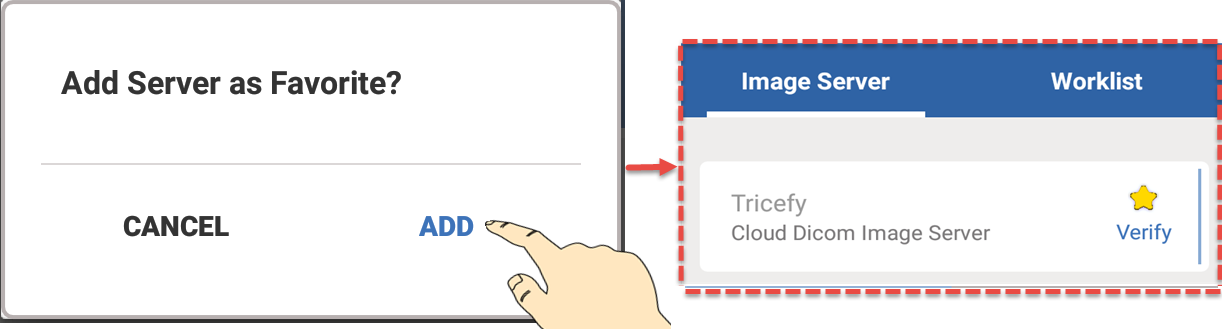
You will know that Tricefy was successfully added as your favorite because it be marked with a star.
Remember, in order to save an examination to any server using the Vscan, patient data for that exam must be entered.

 Copyright ©