Tricefy works with external (local) DICOM servers, which includes any PACS (Picture Archiving and Communication System) or any alternative archiving/storage system.
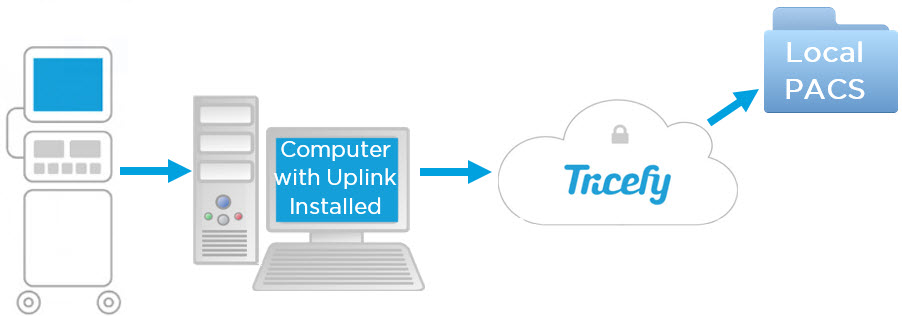
When using an external DICOM server, Tricefy receives data from the imaging system and routes it to the external server:
Clinics can choose at any point to use Tricefy as their archiving platform instead, or they can choose to continue to route their data to an external server indefinitely.
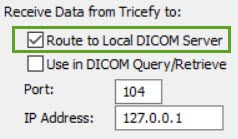
To route data, the Route to Local DICOM Server checkbox must be selected during installation. This key component tells Tricefy where to send the data (by entering the Port and IP Address of the local server).
To automatically send data (either all data or just specific data) to the external server, your Account Administrator can set up an automation rule.
 Instructions for Setting up Automatic Routing
To manually send selected studies to the external server, select the study (or studies) on the Study List and choose Send to DICOM Server from the Send to menu:

A pop-up window will display so that you can specify the Uplink (configured during installation to route content to this destination). Installed Uplinks will be populated into the drop-down menu for selection. Most clinics only have one Uplink:

Select Send to Server to route the study/studies to your external/local server.
If a DICOM server was not specified during installation, an error message will display:
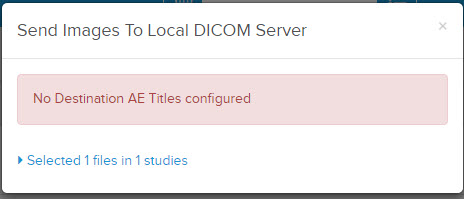
In this event, re-install Tricefy Uplink and check Route to Local DICOM Server during the installation.
Advanced Uplink Installation Instructions
Studies can also be sent to a local DICOM server using Query and Retrieve. With this option, you can use your local PACS/EMR to find and receive studies from Tricefy.
 Copyright ©