When using ViewPoint, you can share with patients using complete anonymization with the Local/Anonymization Uplink.
For all customers, DICOM images are always anonymized for patient-sharing (and non-DICOM content is password protected). However, you can accomplish complete ("strict") anonymization by using the Anonymization Uplink. Strict anonymization discards any non-DICOM content and not only anonymizes the data sent to the patient, but also the data uploaded to Tricefy.
 See all the removed and anonymized data
Here is how it works:
Step 1 - Install the Advanced Uplink & Configure ViewPoint
The Uplink software is installed on the computer/server that is running ViewPoint; this only takes a few minutes. Next, ViewPoint needs to be configured in order to communicate with Uplink (as further explained in Step 4).
Our Customer Success Team will quickly guide you through this process.
Learn more about Tricefy Uplink
See Advanced Uplink installation instructions
See ViewPoint configuration instructions
When installing the Advanced Uplink, Enable the Expert setting (on the third screen of the installation wizard) and enter Anon-LPU-O.
Step 2 - Perform the Examination
This step does not change your current workflow.

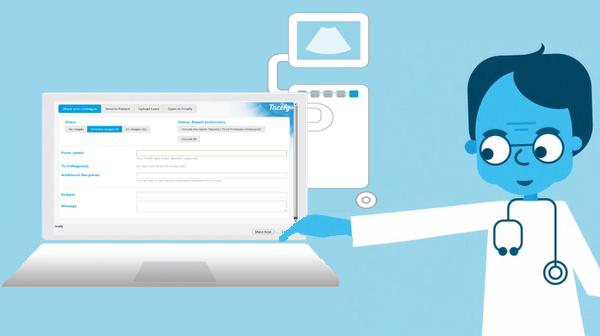
Step 3 - Use the Tricefy Add-on (for ViewPoint) to share the Exam with the Patient
It only takes a minute (three button clicks) to start sharing the examination.
Step 4 - ViewPoint contacts Uplink
This step happens automatically.
Software/computers often speak to each other using something known as an API. When one computer contacts another computer, this is known as an API Call.
During the call, the initiating computer (in this case, ViewPoint) tells the other computer everything it needs to know. As the name suggests, it is comparable to a phone call between two humans.

Once the information is shared, the call is complete.
Learn about encryption and API security
Step 5 - Uplink Anonymizes Data
ViewPoint will assign each exam image/clip an ID number. During the API call, it will provide the ID numbers to Uplink. Uplink will anonymize each image/clip by removing most of the DICOM data.
DICOM data is the data captured by the imaging system/ViewPoint (usually entered by the sonographer). While most things, like patient address, patient weight, performing physician, study ID, procedure, etc. are completely removed, there are a few things that cannot be removed. These things are anonymized instead:
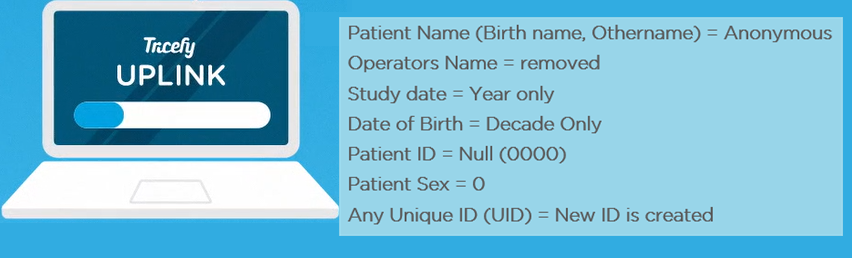
For example, every patient's ID will be 0000.
See all the removed and anonymized data
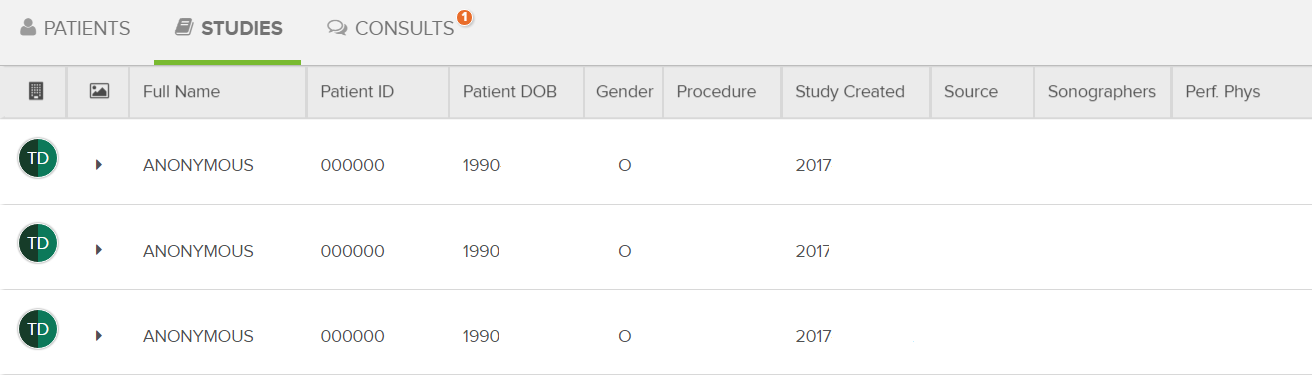
Step 6 - Uplink sends data to Tricefy
This step automatically occurs once anonymization is complete. Since all information has removed from the examination, everything will look the same on your study list (in Tricefy):
Step 7 - The Patient receives & Enjoys their Images
This step is also automatic and occurs immediately once the images arrive in Tricefy. During the API call, ViewPoint told Uplink where to send the data. Just as if this information was shared over the phone, it is not shown, logged, nor saved anywhere in Tricefy.
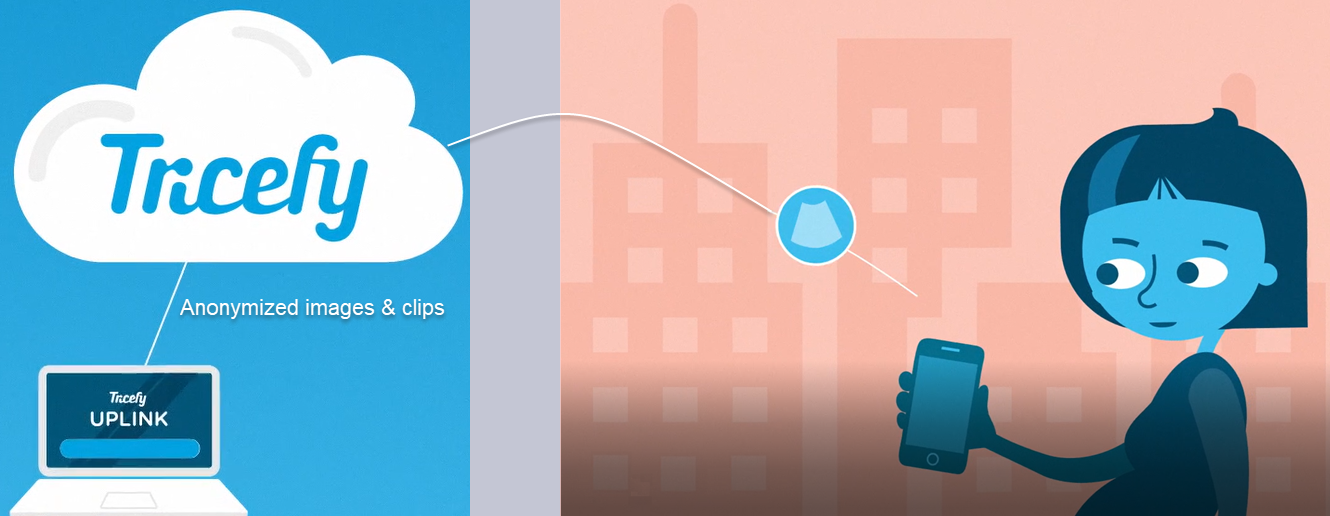
The images will be sent to the patient by sending them a link (either via text or email, depending on what was entered into ViewPoint) to their own unique website. The images and cine clips are completely anonymized (stripped of all data) and can be shared, downloaded (as .JPG and .MP4 files) and viewed from any device.
 Copyright ©