Learn how to use the sleek to new design to continue to view study details, attach files, add labels, change the status of your study, add notes, and access reports.
The![]() icon on the right side of the screen toggles the side info panel open and closed.
icon on the right side of the screen toggles the side info panel open and closed.
Studies Screen
When the side information panel is opened on the Studies screen and nothing is selected, the panel displays a time-stamped history log of your clinic's activity. This includes when studies were last viewed and shared.

- Account Activity tab: Displays a history log that includes all members of your clinic
- My Activity tab: Displays a history log of only your actions
Selecting a study changes the content in the side panel. The selected study will be blue on your Studies screen:

Side Panel Content
Side panel operation is the same on the Studies screen and Viewer.
The information on the side panel is organized into six tabs:
1) Info Icon
The Info tab shows the date of the study, when the study expires, patient information (name, gender, date of birth), procedure information (physicians, procedure), and status and size of the study.
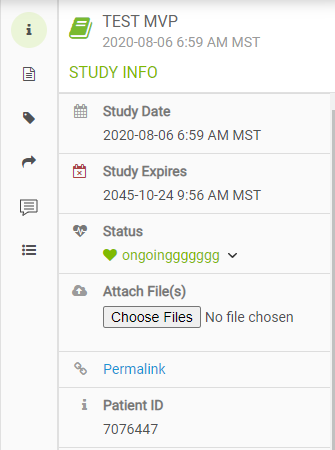 | Attaching FilesTo attach files, such as a report, PDF, or image file, select Choose Files (if using Internet Explorer, this button reads, Browse) and select files from your computer/network
|
2) Reports Icon
The Reports tab displays pending or finalized reports associated with the study. This is only available for those using Tricefy reporting. If there is a pending report, an orange badge will appear
Select a pending or finalized report from the side panel to view the report. |
3) Labels Icon
The Labels tab displays labels that are applied to the study (or to a file within the study) and provides opportunity to add and remove labels. Labels help filter, sort, and search for studies.
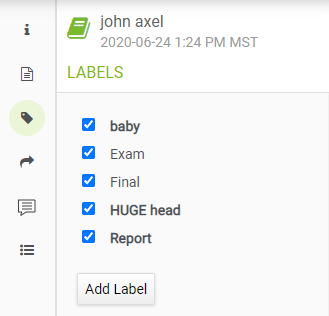 | Select the + button to add a label. Choose a previously used label or type a new label. Select Done Adding Labels once all labels are applied. |
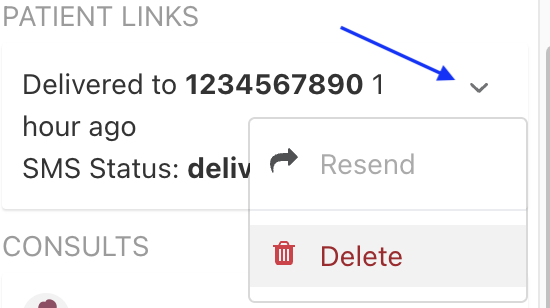
4) Shares Icon
The Shares tab displays a log of when and where the study was previously shared:
Studies that were shared with a patient are listed under Patient Links. If the patient accidentally deletes images or needs them sent again, resend them by selecting the drop-down arrow. This method will send the same link to the same contact information. There is also an option to delete the patient link completely so the link can no longer be used.
|
If the study was sent to a colleague/another doctor, it will be logged under Consults. It will let you know when your colleague viewed the study. If they have yet to view the study, it will say, Unread.
 Learn more about sharing with doctors
5) Notes Icon
The Notes tab displays any notes or annotations made within the study.
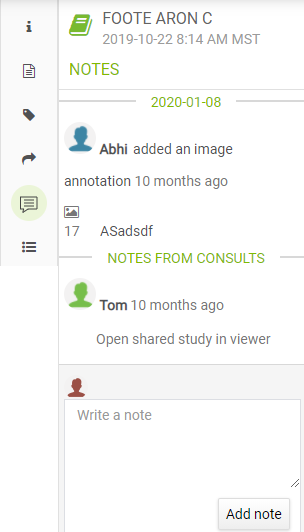 | To add a note, type into the text box, followed by Add Note. |
6) Activity Icon
The Activities tab displays all activities regarding the selected study.
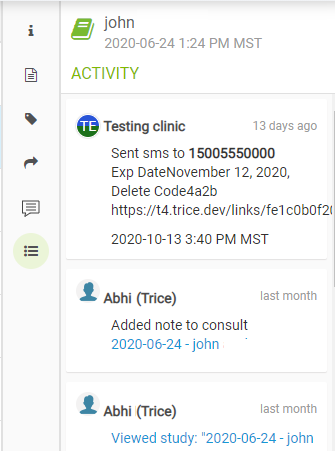 | Activities include patient shares, new or deleted notes, annotations, who viewed the study, when the study was last viewed, updated reports, and finalized reports. |
Selecting Multiple Studies
To select multiple studies, hold down the Shift key on the keyboard while making selections. When multiple studies are selected, the side panel content shows the following:
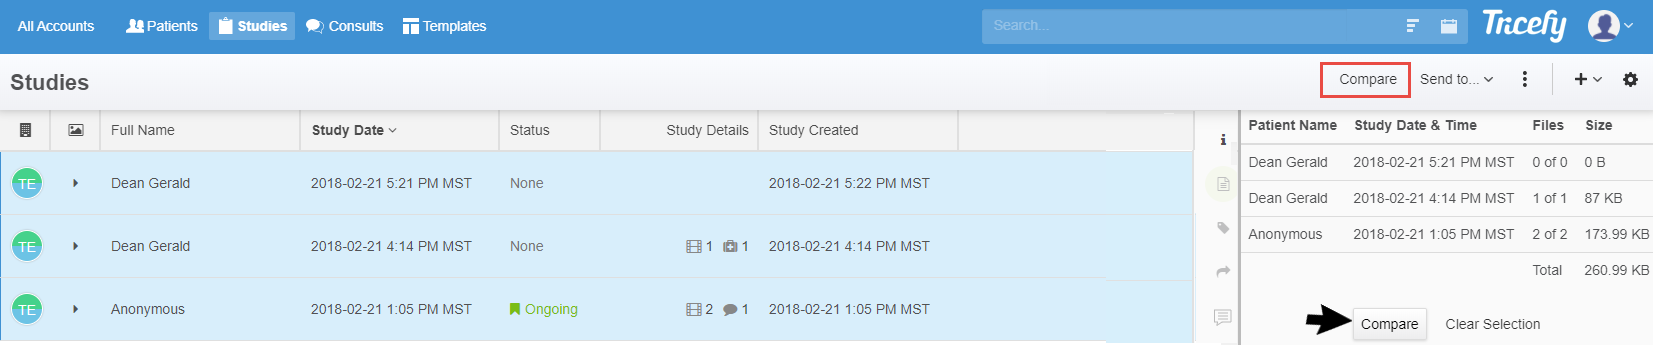
Selecting Compare will open all studies, side by side, in the Viewer.
 Copyright ©