Select Statuses in your Account Settings to add, delete and modify statuses used by your clinic. Statuses are shown on your Study List and change when double-clicked.
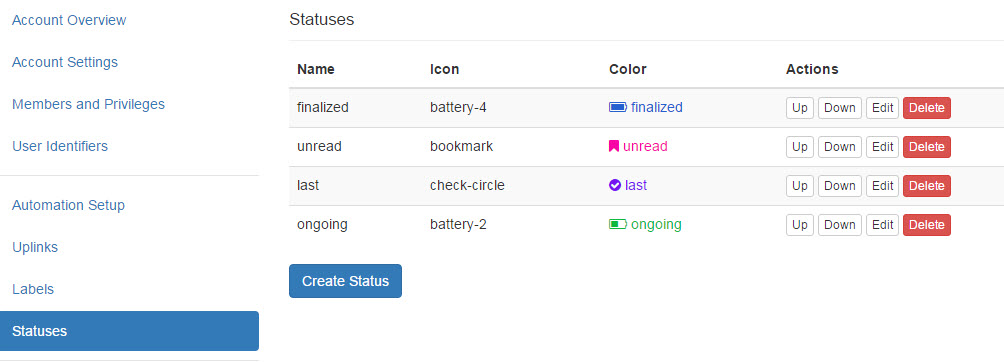
Existing statuses are listed, showing the Name, Icon and Color that were chosen when the status was created:
- Select Edit next to a status to modify these properties
The Up and Down buttons change the order that the statuses are listed.
To remove a status, select Delete; users will not be able to further use the status.
Create a New Status
To create a new status for the clinic, select Create Status and complete the following:

1) Enter a name into the Name field that describes the status. A status cannot be used if it does not have a name.
2) Choose a color for the icon; a color palette will display, as shown above.
3) Select icon from the drop-down menu to represent the status
4) Select Create Status
The following is an example of choosing a Heart icon and specifying a pretty purple color on the palette:

After a status has been created, users can select it by double-clicking the status icon located on the Study List:

If users do not see the status column on their study list, they need to modify their Study List Page Settings.
 Copyright ©