To configure your GE LOGIQ to send data to Tricefy:
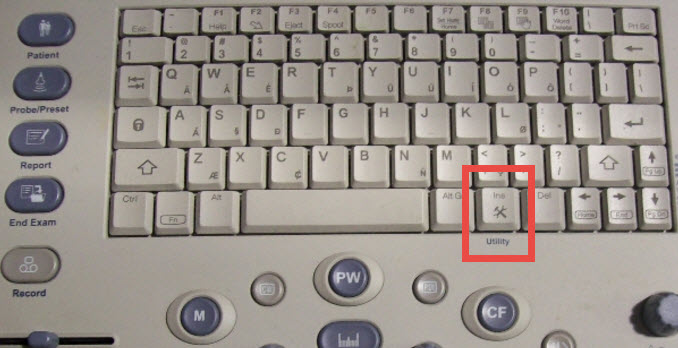
1. Select the Utility hard-button located on the machine:
2. A list of tabs will display at the top of the screen. Click Connectivity:

3. A sub-list of tabs will display. Click Device:
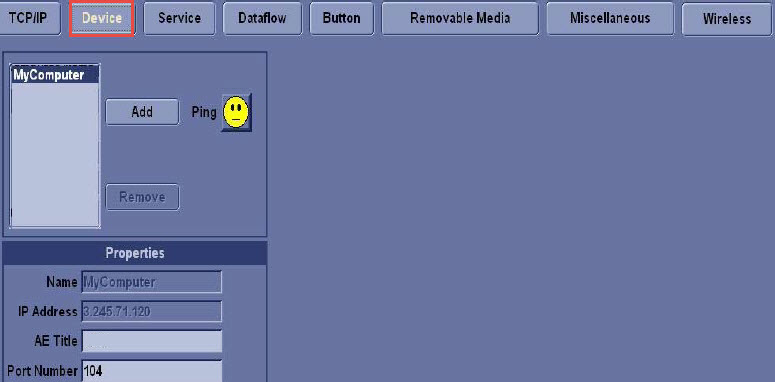
4. Add Tricefy as a device (this "device" is the computer running the Uplink software). Click the Add button and enter the following information into the Properties box.
AE Title = Tricefy
IP Address = as shown during installation and in the Account Settings
Port = 104 or 105 (as shown during installation and in the Account Settings)
5. Click the Service tab:

6. We need to define the service Tricefy provides - Choose Dicom Image Storage from the first drop-down menu (shown below in the red box), followed by Add.
If the option Dicom Image Storage is not available in the drop-down menu, please contact your GE service/sales representative to unlock this feature.
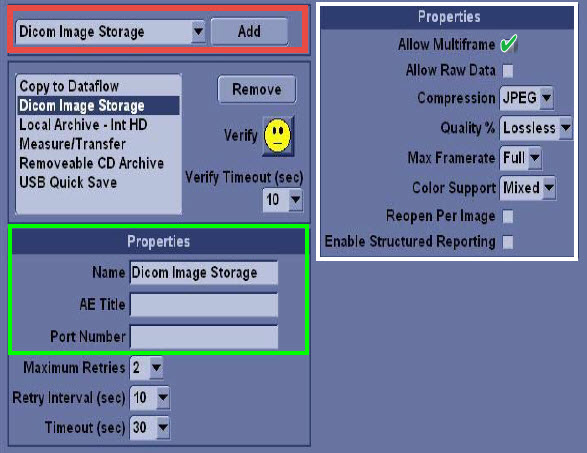
This storage is for archiving images. Enter the following information under Properties (shown above in the green box):
AE Title = archive
Port = 104 or 105 (refer to Account Settings)
Make sure the image settings match those shown above in the white box.
7. Now we will add storage for patient-sharing by repeating the steps above (select Dicom Image Storage from the drop-down menu, followed by Add).
This time, enter the following information under Properties:
AE Title = patient
Port = 104 or 105 (refer to Account Settings)
Make sure the image settings are set to those shown above in the white box.
8. Click Verify to confirm everything is working correctly.
References
 How to test your imaging system
Port and IP Address of the Uplink computer
GE Support page
Note: GE ultrasound machines are consistent in configuration and functionality across varying models.
 Copyright ©