Creating an automation rule will send HL7 messages to the destination folder that was specified during the HL7 Uplink Installation.
First, please refer to the following steps to get started:
- Step 1: Create your automation rule - select Automatically Generate Outbound HL7 Messages as the Integration Type
- Step 2: Add conditions that trigger this automation
Note: If conditions are not added, the automation will be applied to all examinations.
- Step 3: Complete the following information:
- Uplink: Select the Uplink from the drop-down menu
- Custom Format: Outbound messages require the same format as inbound messages:
- All messages must begin with MSH
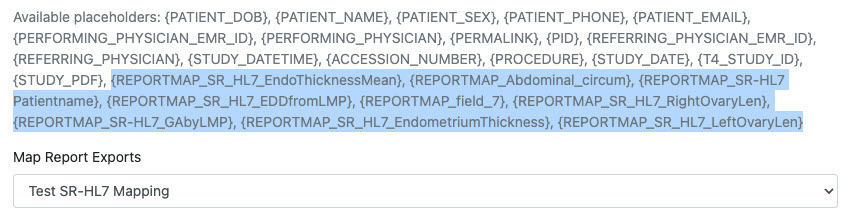
- All Placeholders must be between brackets { }
- All data is separated by a "pipe" character |
- You can use any of the listed "placeholders." For example, {REFERRING_PHYSICIAN} will insert the name of the referring physician.
- Optional: Choose a template under Map Report Exports to insert SR values into the placeholders
- Export fields in reporting templates
- The rule will automatically update if SR values are changed in the reporting template
- New placeholders from the template will begin with {REPORTMAP_ ....}

Select Update Automation Settings when you are finished.
Interface Status Details
To resend messages, or to see if they were successfully sent, select the examination the Study List and select the Interface Status Details link in the side Info Panel:

If the status is "success", it means that the examination was successfully sent to the destination folder.
- Select Resend HL7 Message to send the message again
If the status is "failed", it means the examination was unable to send. When possible, a failed status will include an error message. Contact Customer Support if this occurs.
 Copyright ©