Follow the process below to configure your ultrasound system to send data to Tricefy.
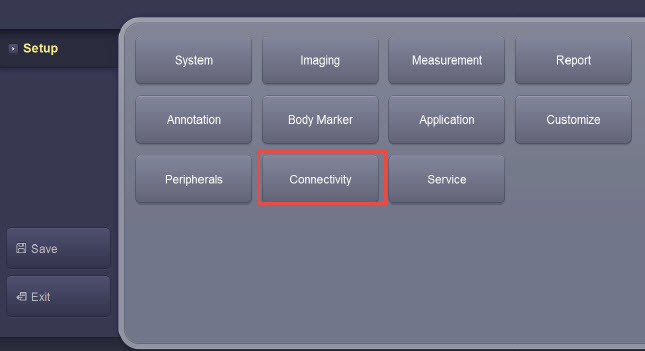
First, press Enter on the keyboard to access the Setup screen and select Connectivity:

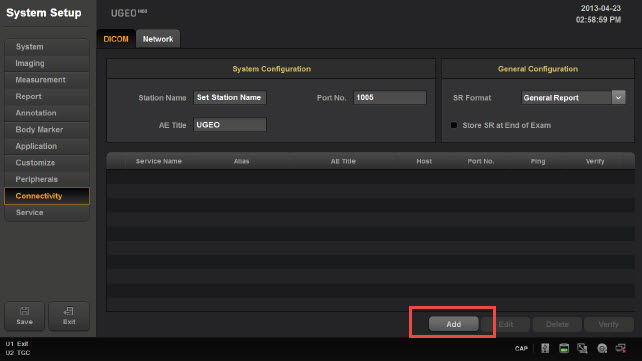
The Connectivity screen allows you to add new stores. These stores are like warehouse receiving centers; they receive the data from your ultrasound system.
We will create two stores: one for sending images to patients and one for archiving.
First, we will add the archiving store by clicking the Add button:

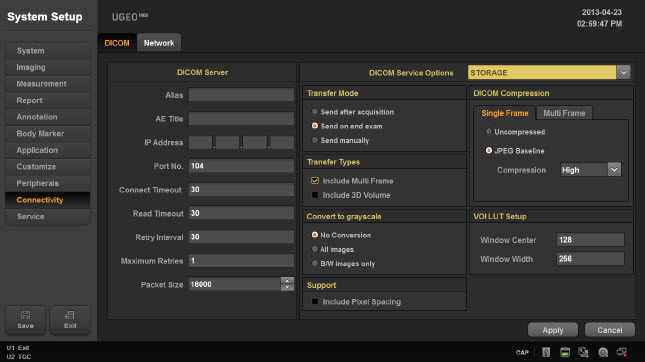
Make sure STORAGE is selected from the DICOM Server Options menu at the top of the screen, and enter the following information into the top four fields of the DICOM Server box:
Alias = Trice Archive
AE Title = archive
IP Address = shown during installation or refer to Account Settings
Port = port Uplink was configured to listen on during install (refer to Account Settings)

Make sure that JPG Baseline is chosen under the DICOM Compression settings.
Save the information by clicking Apply. We will return to the previous screen.
Next, we will add the patient-sharing store by clicking the Add button again. Follow the steps outlined above and enter the following information into the top fields of the DICOM Server box:
Alias = Trice Patient
AE Title = patient
IP Address = shown during installation or refer to Account Settings
Port = port Uplink was configured to listen on during install (refer to Account Settings)
Make sure that JPG Baseline is chosen under the DICOM Compression settings and click Apply again.
Once again, we will return to the Connectivity screen. We can make sure our system is working by selecting the Verify button in the bottom-right corner. A Success message means you are ready to send studies to Tricefy.
For additional instruction, refer to the H60 Operation Manual: Samsung H60.pdf. You can also press the Help button on the Samsung keyboard to open an electronic version of the user manual.
 Copyright © 2016-2026 Trice Imaging, Inc. All rights reserved. 1065 SW 8th Street | PMB 5828 | Miami, FL 33130 | USA