To access your settings, select Personal Settings from the user menu at the top of the screen:

The first tab (default tab) contains Profile Settings. Select Back to Tricefy to return to the Studies screen:
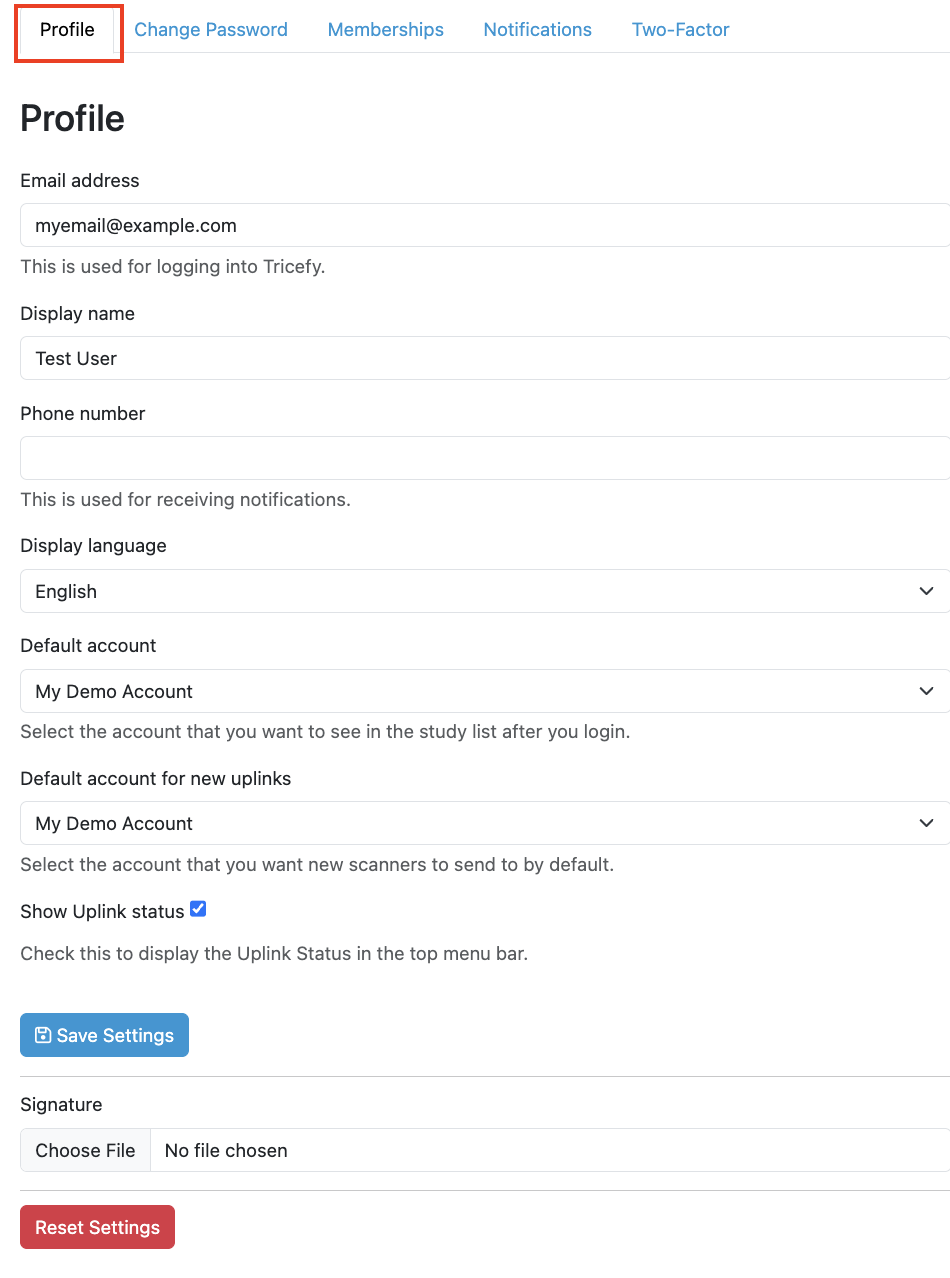
- Email Address: This is the email address used to log into Tricefy
- If you change your email address, you will receive an email notification to the previous email that your login email was updated
- Display Name: This is the name that appears throughout Tricefy, including activity logs and Tricefy reports
- Phone Number: This is the number that receives text notifications if you have SMS notifications enabled
- Display Language: Changing this option will change the language shown on your screen
- Default Account: This is the account that displays when logging into Tricefy. Selecting All Accounts will display patients, studies, and consults belonging to all your clinic accounts.
- Default Account for New Uplinks: This is the account that will receive images for any newly installed uplinks
- Auto is default (and recommended) option - studies will be sent to the account that installed the new uplink
- Show Uplink Status: When this option is checked, your Uplink status will be shown at the top of the user menu to indicate if your Uplink is working properly
- A gray icon indicates that Uplink is not installed on the computer/server
- A green icon indicates Uplink is functioning properly
- An orange icon indicates that some Uplinks are working but at least one Uplink is not
- This is only applicable to users with multiple Uplinks
- A red icon indicates Uplink is installed but not functioning. This is often because the computer is turned off or disconnected from the internet.
- If your Uplink status is orange or red, refer here for additional troubleshooting steps
Click "Save Settings" to apply the changes
Signature: Used for signature insert on finalized Tricefy reports
- This is only applicable to Tricefy report templates with the "Signature" element in it
- The signature must be an image file (JPG or PNG)
Reset Settings
The Reset Settings button returns all settings to the original, default values. These include:
- Language set to English
- Uplink Status shown in user menu
- Email Notifications turned on: See instructions on turning off notifications
- Viewer displays four images (4 x 4) and study list sidebar active (monitor settings)
- Page Columns on your Studies screen returned to Full Name, Patient ID, Patient DOB, Study Date, Study Details, Sonographers, and Performing Physician.
- Page Columns on your Patients screen returned to Full Name, Patient ID, Patient DOB, and Show Studies
 Learn more about changing columns on the Studies screen
Learn more about change columns on the Patients screen
A confirmation message displays before the settings are reset. Select OK to proceed. These settings do not need to be saved and this action cannot be undone.
 Copyright ©