The Getting Started screen displays after the initial login of a brand new account. It is always accessible by selecting Getting Started from the User Menu (in the upper-right corner of the screen):

The Getting Started screen will walk through five steps for setting up your computer and ultrasound system. Our Customer Support is available to help.
1. Install Uplink
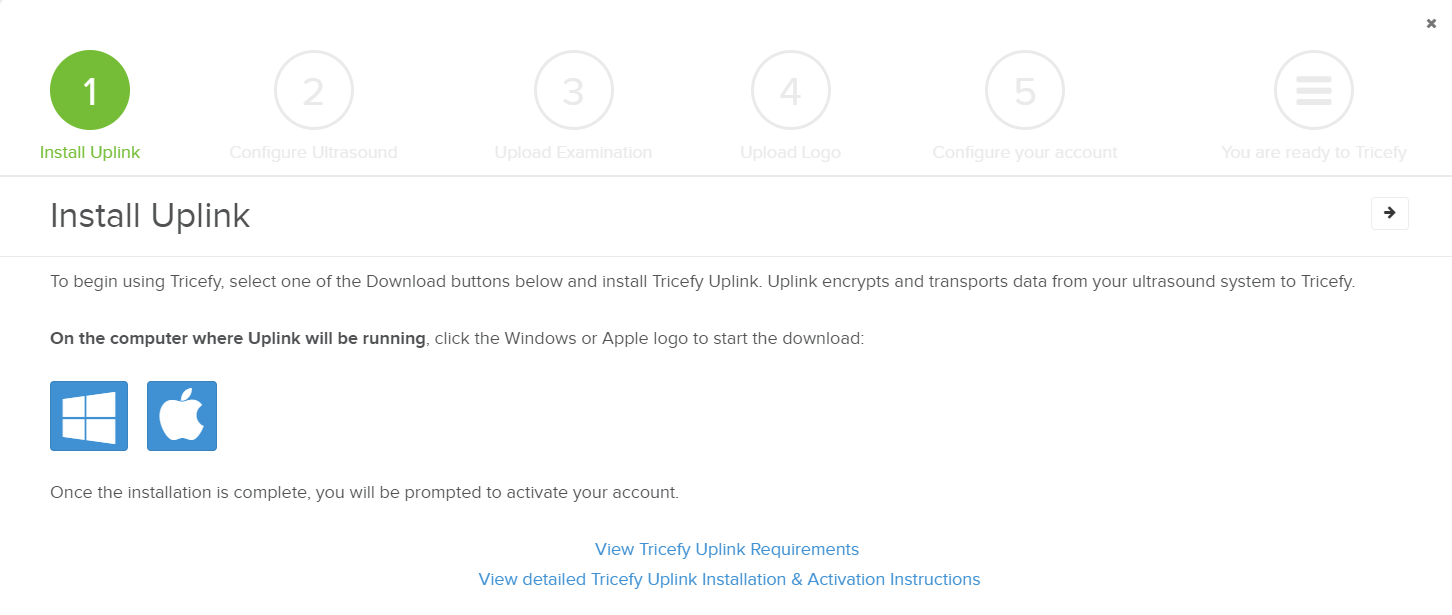
Uplink is the bridge that connects your ultrasound system to the Tricefy Cloud.
 Learn more about Tricefy Uplink
To download Uplink:
- Select the Windows icon if you are using a PC
- Select the Apple icon if you are using a mac
It is very important to do this on the computer where you want to install the software
After the software downloads, an installation wizard will guide you through the installation process.
Installation instructions provide additional help
2. Configure Ultrasound
You should see your newly installed Uplink listed on the second step of the Getting Started screen with an IP address and Port number. We need to enter this information into the DICOM Settings of your ultrasound system (this information tells your system how to send data to Uplink).
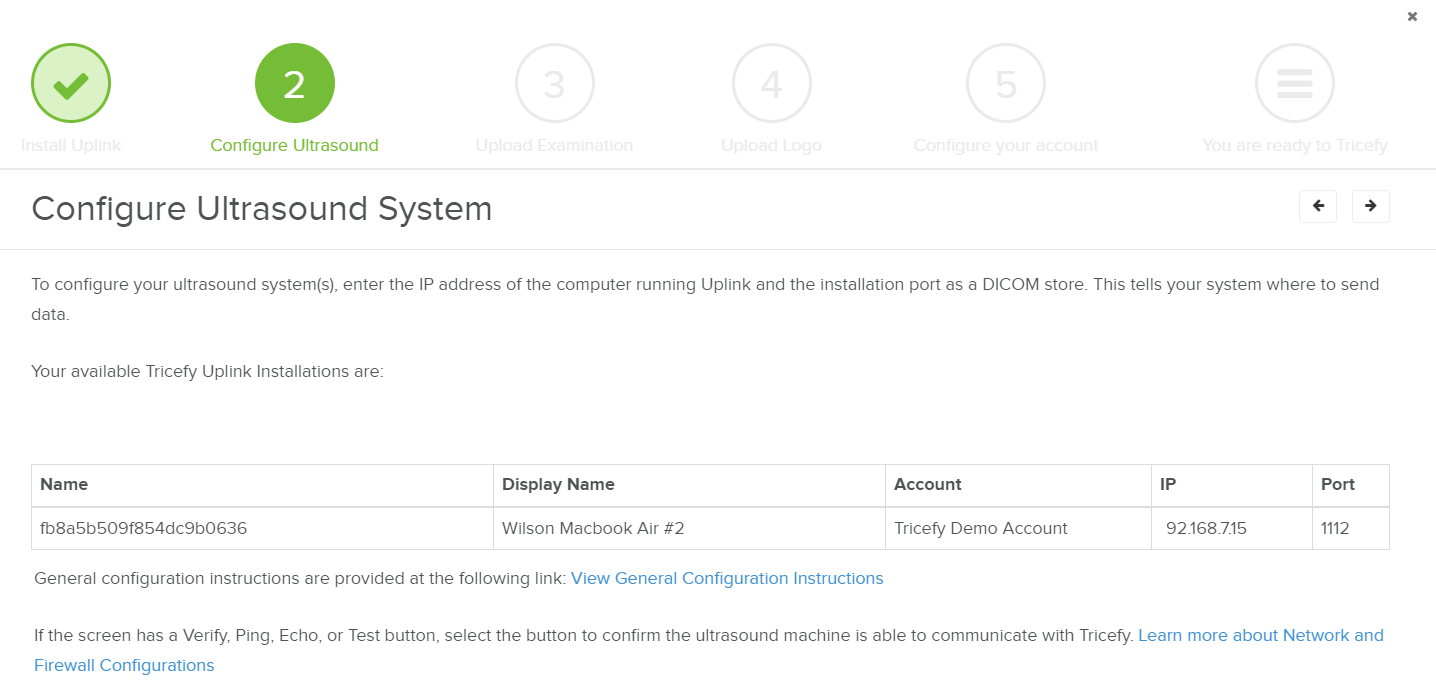
Select the View General Configuration Instructions for high-level instructions. You can also visit our configuration page that has detailed instructions for popular ultrasound systems:
View the Configuration Page with specific instructions
3. Upload an Examination
Send your first exam to Tricefy to confirm that your Uplink and ultrasound system are setup correctly:
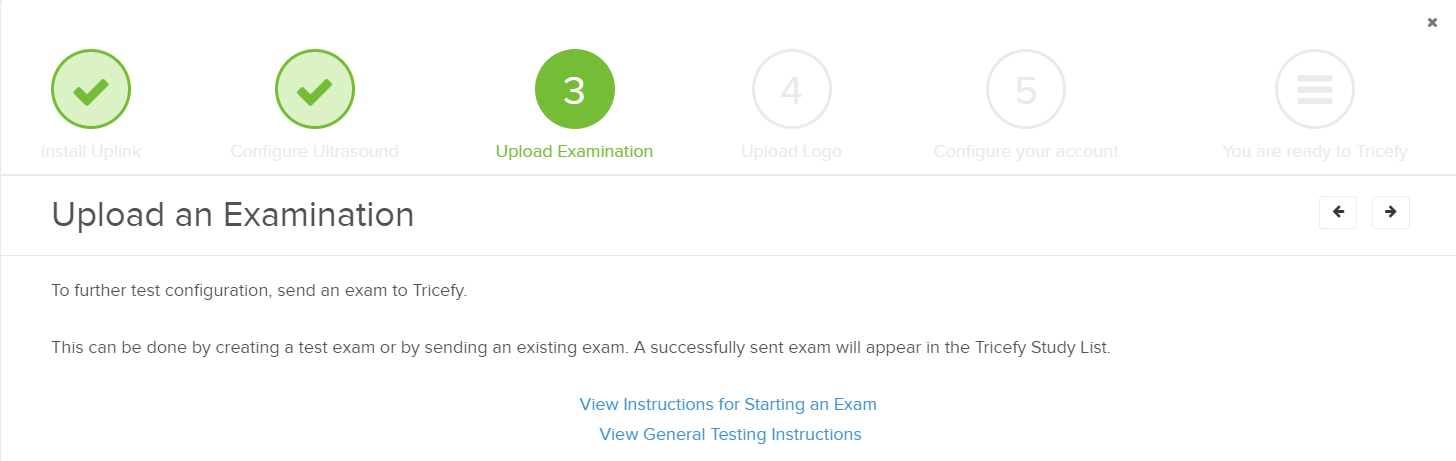
You can send a study by selecting the Send or End Exam button on your ultrasound system. You can also configure a P button to send studies:
See instructions for configuring P buttons
You'll know your exam was successfully sent to Tricefy because you will see it on your Study List!
4. Upload a Logo
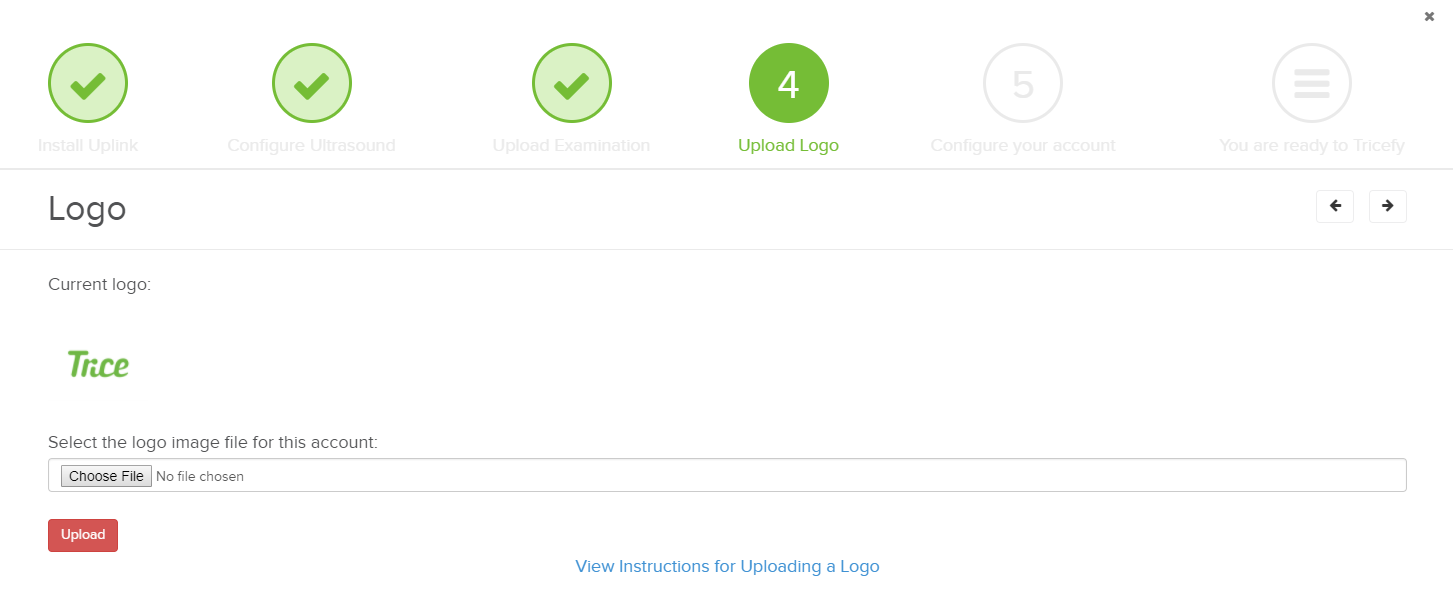
This step is not required for using Tricefy, but most clinics prefer their logo on patient-facing images and emails. Select the Upload button to choose a file to upload (you can add or change a logo at any time).
5. Configure Account
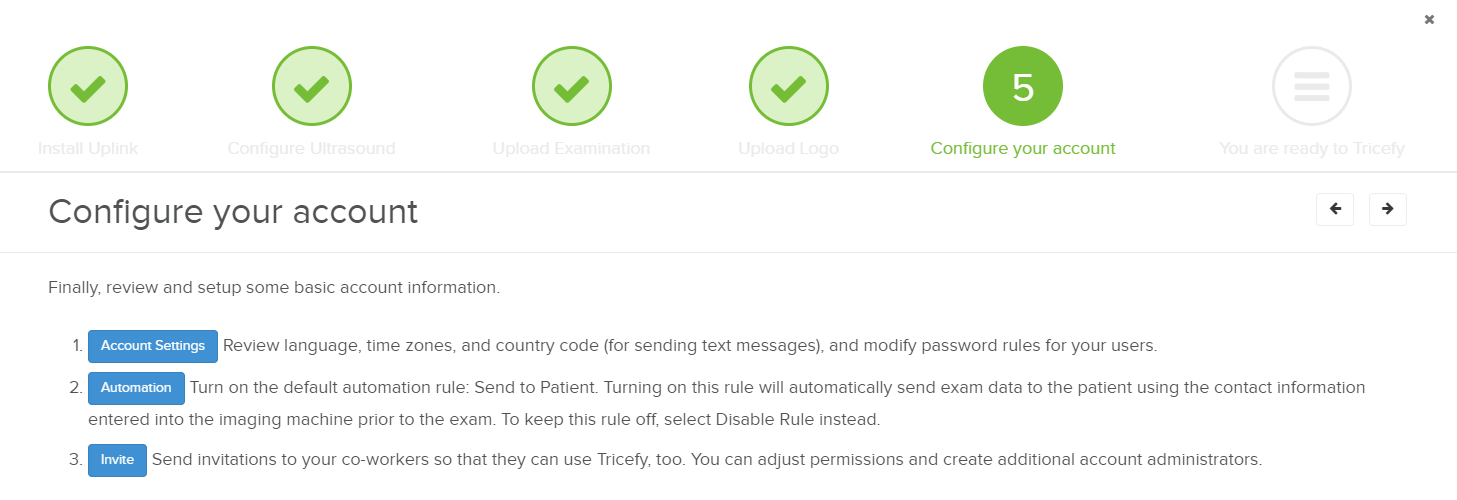
Before using Tricefy, we recommend:
- Select Account Settings to make sure everything looks right
- Select Automation to turn on or disable the automatic send-to-patient feature
- This feature is useful if you are planning to send examinations to your patients. When enabled, the patient will automatically receive their images after the exam. If you prefer to review images before sending them, disable this rule.
- Select Invite to send email invitations to your staff so that they can also use Tricefy
You can change your account settings, invite more users, and remove users at any time.
See instructions for modifying account settings
After completing the Getting Started screen, you are officially ready to Tricefy!!
 Copyright ©