After you activate your Tricefy account, it only takes a few seconds to setup your machine. You can automatically send data to Tricefy at the end of each exam (by pressing the End Exam button) and/or share exams with patients by pressing a P button.
First, select the Button Configuration tab:

- For archive-only users, refer to the Archiving step immediately below
. - For patient-sharing only users, refer to the Patient Sharing step
. - Refer to both steps if using both the archiving and patient sharing features
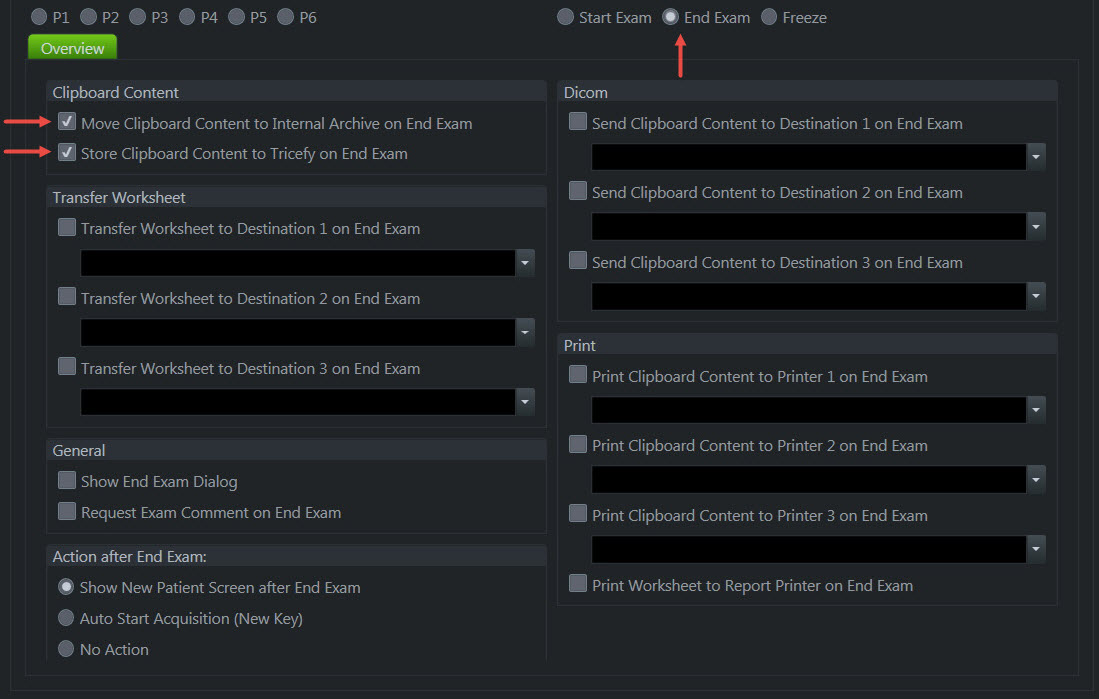
Archive: Sending Data at the End of Exam
To send data when the exam has ended, select the End Exam option and make sure Move Clipboard Content to Interval Archive and Store Clipboard Content to Tricefy are selected in the Clipboard Content box.
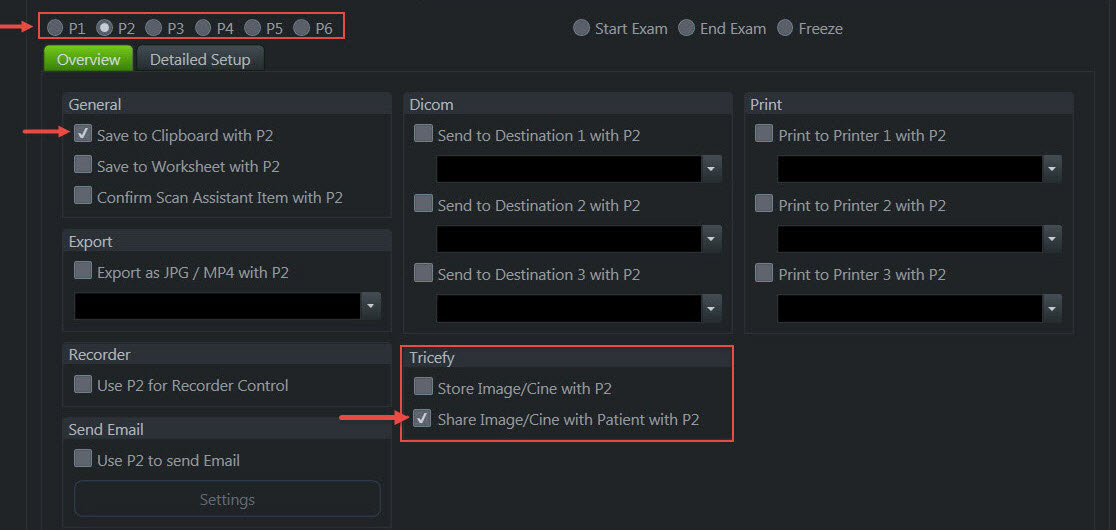
Patient Sharing: Sending Data with a P Button
To send data by pressing a P button, select the P button you would like to use (P2) and make sure Save to Clipboard with P2 is selected in the General box. Select Share Image/Cine with Patient with P2 in the Tricefy box.
If you have ultrasound systems that do not have Tricefy Inside but would like to connect them to Tricefy account, please refer to our standard Getting Started Guide for configuration steps.
 Move to Step 3 - Sending a Study
 Copyright ©